Tuesday, November 24, 2015

Skillet-Roasted Chicken and Stuffing

Hello!

It's been entirely too long...

I hope you all are doing well. Thank you to everyone who has still stopped by my blog, even though I have not posted anything in several months. I never intended to be gone for that long, but my goodness, this year has flown by! You may have noticed I have not posted a recipe since February. I do work full-time, and back in February I took on several new responsibilities at my job. Needless to say, I had a very busy first few months of the year, and I kind of just let other things fall by the wayside. Thankfully, things have started to slow down and I have a much more manageable workload.

I'm really excited to be back this week as I prepare for one of my favorite holidays: Thanksgiving! I will say that Christmas has always been my absolute favorite holiday, with Thanksgiving coming in a close second. As I get older, I am growing to appreciate Thanksgiving more and more. While I love Christmas and what it stands for, it certainly gets more stressful to prepare for year after year. I think I just love the simplicity that is Thanksgiving: family and food. There's no gift buying to do, just good food and time to spend with family and friends.

Speaking of Thanksgiving, I started some of my prep today. I have homemade chicken stock simmering on the stove as we speak and am getting ready to start on pie crust.

That brings us to today's recipe (sorry for the long intro!), Skillet-Roasted Chicken and Stuffing. I came across this recipe on an episode of Cook's Country and have intended to make it for quite some time. I finally made it a couple weeks ago and it did not disappoint. I love a good, homemade dressing, but it can be time consuming. This recipe simplifies the stuffing but does not sacrifice quality or flavor. What I like most about this is that the chicken and stuffing is all done in one pan. Easy prep and easy clean up makes this a great dish for a weeknight meal.


Also, if you are anticipating a small crowd for Thanksgiving, this dish would be a great alternative to making a large turkey with all the sides.


Skillet-Roasted Chicken and Stuffing
Adapted from Cook's Country, February/March 2013

Ingredients
  • 1 small, whole chicken (4-5 lbs)
  • 6 tablespoons unsalted butter
  • 2 tablespoons minced fresh sage
  • 2 tablespoons minced fresh thyme or 1 teaspoon dried thyme (I did not have fresh so I used dried and I used a little less because I wanted to add some fresh parsley for some added green)
  • 2 tablespoons minced fresh parsley
  • Salt and pepper
  • 2 small onions, finely chopped
  • 2 celery ribs, minced
  • 7 ounces French Bread cut into 1/2-inch pieces (6 cups)   
  • 1/3 cup low-sodium chicken broth
Directions
1. Preheat oven to 375 degrees, adjust oven rack to low-middle position. Melt 4 tablespoons of butter. Stir in half of the sage and thyme, 1 teaspoon of salt, and 1/2 teaspoon of pepper. Pat chicken dry with paper towels, then brush the herb/butter mixture all over the chicken, set aside. 
2. Melt remaining 2 tablespoons of butter in an oven-safe, 12-inch skillet over medium heat. Add onions and celery and saute until softened, about five minutes. Add remaining sage and thyme, parsley, 1/2 teaspoon salt, and 1/2 teaspoon pepper and cook until fragrant, about one minute.
3. Off the heat, place chicken breast side up in the skillet. Arrange bread cubes around the chicken in the bottom of the skillet. Transfer skillet to the oven and roast until breasts register 160 degrees and thigh register 175 degrees, about one hour to one hour fifteen minutes. Rotate skillet halfway through roasting.
4. Carefully transfer chicken to serving plate and lightly tent with foil. Allow chicken to rest for at least 15-20 minutes before carving. 
5. Stir the toasted bread and vegetables (skillet handle will be hot!) until incorporated. Cover and allow to sit for 10 minutes. After the 10 minutes, uncover and stir in chicken broth and any chicken juices that have accumulated on the plate. Warm stuffing over low heat for about three minutes.
6. Carve chicken and serve with warm stuffing.

Note: If you do not already own one, I highly suggest that you invest in an instant-read meat thermometer. I own this one by ThermoWorks and love it! It has not let me down.


Saturday, February 14, 2015

Chocolate Covered Strawberries

Need a last minute Valentine's idea? Make your own chocolate covered strawberries for your sweetheart!


Chocolate covered strawberries are a popular gift for Valentine's day. They can be a little pricey if you purchase them, so I always opt to make my own. All you need is a good-quality chocolate, fresh strawberries, and some white chocolate for drizzling.

To ensure that the strawberries stay nice and fresh, I wash them in a 4-to-1 solution of water and vinegar (you can find more details on the method here). Allow the berries to soak for a little bit, drain, and pat dry with paper towels. Washing the fruit with a little bit of vinegar kills bacteria and helps the berries stay fresher, longer.

To melt the chocolate, I prefer to use the double-boiler method but have included microwave instructions if you opt . No matter which way you do it, you need to stay right by the chocolate--don't walk away! Semisweet or milk chocolate is best for melting. I've tried to use dark chocolate, but it does not melt as well. You really need a chocolate that has enough fat to melt to the right consistency. Once the chocolate is melted, dip your strawberries and decorate with melted white chocolate.


Chocolate Covered Strawberries

Ingredients
  • 1 pound fresh strawberries
  • 8 ounces semisweet chocolate chips
  • 4-5 ounces white chocolate chips
 Directions

1. Line a baking sheet with parchment paper. Set aside. Rinse strawberries and pat dry with paper towels (you can find my method for washing fruit here).

2. Fill a medium size saucepan one-third of the way with water. Bring the water to a light simmer. Pour semisweet chips and a smaller size saucepan and place saucepan into the simmering water. Once chocolate begins to melt, stir continuously with a rubber spatula until melted and smooth.

3. Dip Strawberries into melted chocolate and place on parchment paper. Melt white chocolate chips in the same manner and pour into a small Ziploc bag. Cut off one corner of the bag and pipe melted white chocolate onto the dipped strawberries. Refrigerate strawberries for 30 minutes or until chocolate is set. Enjoy!

Microwave instructions: Place chips into microwave safe bowl and microwave on medium to low power in 15 sec increments. Stir well after each increment until chocolate is smooth. This should only take 30-45 seconds total for the amount of chocolate used.

Wednesday, December 31, 2014

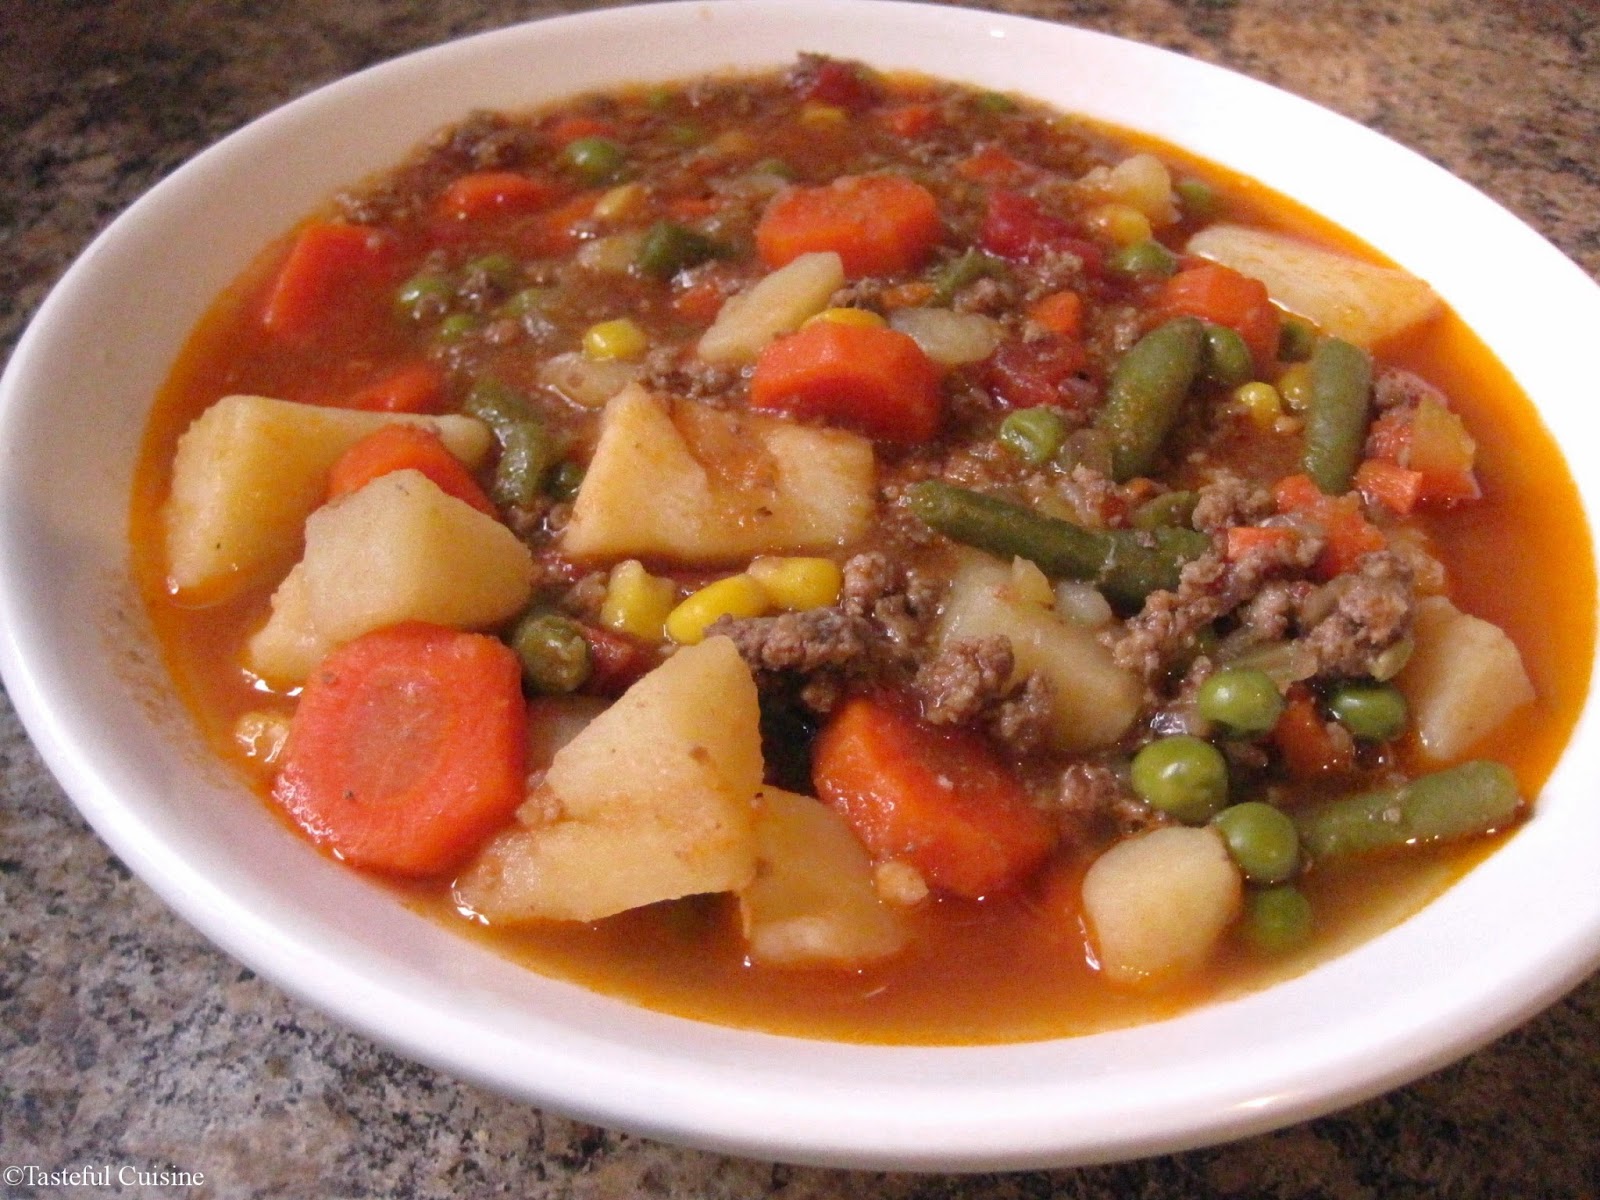
Vegetable Beef Soup

My personal take on a comfort food favorite: vegetable beef soup. Slow-simmered and full of flavor.

 
It's New Year's Eve and what am I doing? I've got my sweat pants on and am snuggled up in my favorite blanket watching cooking shows. Yep, New Year's Eve is a pretty uneventful holiday in our house. There's no staying up until midnight for us. Just food, TV, Wii games, and to bed at a normal time.

I was fortunate to take this week off of work. My husband is a teacher so I always try to plan to take some time off during his breaks. It's been a much welcome break this week to have some time to rest and recharge.

Lady has loved the extra snuggle time
I love having the time to cook more when I'm off and away from work. But, in case we make plans, I like to have plenty of leftovers so we can make a quick meal. I made a pot of this vegetable beef soup at the beginning of the week for us have on hand.We had it for dinner one night and will probably get two lunches out of it.

I've had many different kinds of vegetable beef soup. Most everyone I know has a rendition of it with some of the ingredients varying. It's the kind of soup you can make with whatever you have in your pantry/refrigerator. I've been known to make the soup without one or two of the vegetables and it still turns out great.


I wasn't always a fan of this soup. I've had a few versions that were awfully bland, so I have tweaked my version to be flavorful and satisfying. Start by browning the beef and sauteing the onions, celery, garlic, and tomato paste. Assemble the rest of the soup and throw it in the oven for a little over an hour. I like to simmer mine in the oven, but you can easily simmer it on the stove top or throw it in the crock pot and it will turn out just as good.

One thing I've discovered, is that it is best to let the soup rest after cooking for the best texture. I'm not sure if there is a scientific explanation behind it, but I have found that if I serve it immediately, the potatoes tend to fall apart. Once you've take it out of the oven, allow the soup to sit covered for about 20 minutes and uncovered for an additional 5. This allows the soup to cool to a more manageable temperature and the potatoes absorb some of the liquid and firm back up.


Soup always seems to taste better the second day, so this makes great leftovers!


Vegetable Beef Soup

Ingredients
  • 1 lb. ground chuck
  • 1 tablespoon canola or vegetable oil
  • 1 large onion, finely minced
  • 1 large stalk of celery, finely diced
  • 2 large cloves of garlic, smashed and finely minced
  • 1 tablespoon tomato paste
  • 1/2 pound carrots, peeled and diced
  • 1-14.5 ounce can cut green beans
  • 1-14.5 ounce petite diced tomatoes
  • 5-6 medium to large size potatoes
  • 1 cup frozen corn
  • 1 cup frozen peas
  • 32 ounces (4 cups) low-sodium beef broth
  • 1-2 teaspoons sugar
  • 4-5 bay leaves 
  • Salt and pepper to taste
Directions

1. Preheat oven to 300 degrees. In a dutch oven (5 quart size or larger), brown chuck over medium high heat. Break into small pieces as it browns (I like to use a potato masher to break it into even size pieces). Season with 1 teaspoon of salt. Pour beef into strainer and wipe dutch oven clean. Return dutch oven to stove top and heat canola oil over medium-low heat. Saute onions and celery until softened, about 5 minutes. Stir in garlic and cook until fragrant, about 30 seconds. Stir in tomato paste and saute for another minute or until the paste deepens in color.

2. Stir in green beans (including the green bean water from the can), diced tomatoes, carrots, potatoes, corn, peas, bay leaves, sugar, and pepper. At this point, I don't think it is necessary to add additional salt (since we seasoned the beef and the broth is already lightly salted). Taste at the end and see if it needs extra salt. Add in ground chuck and beef broth. Make sure everything is submerged under the broth and bring to a simmer. Once simmering, cover with the lid and transfer to preheated oven and bake for one hour and fifteen minutes.

3. Carefully remove the dutch oven from the oven and allow the soup to sit, covered for 15-20 minutes. Uncover and allow to cool for 5 minutes before serving. Taste and adjust salt and pepper, if needed. Serve with biscuits or crackers.

Yields: 6-8 servings

Source: Tasteful Cuisine (and adapted from the many vegetable beef soup recipes I've tasted).


Happy New Year! I wish you a happy and prosperous 2015.