Wednesday, December 31, 2014

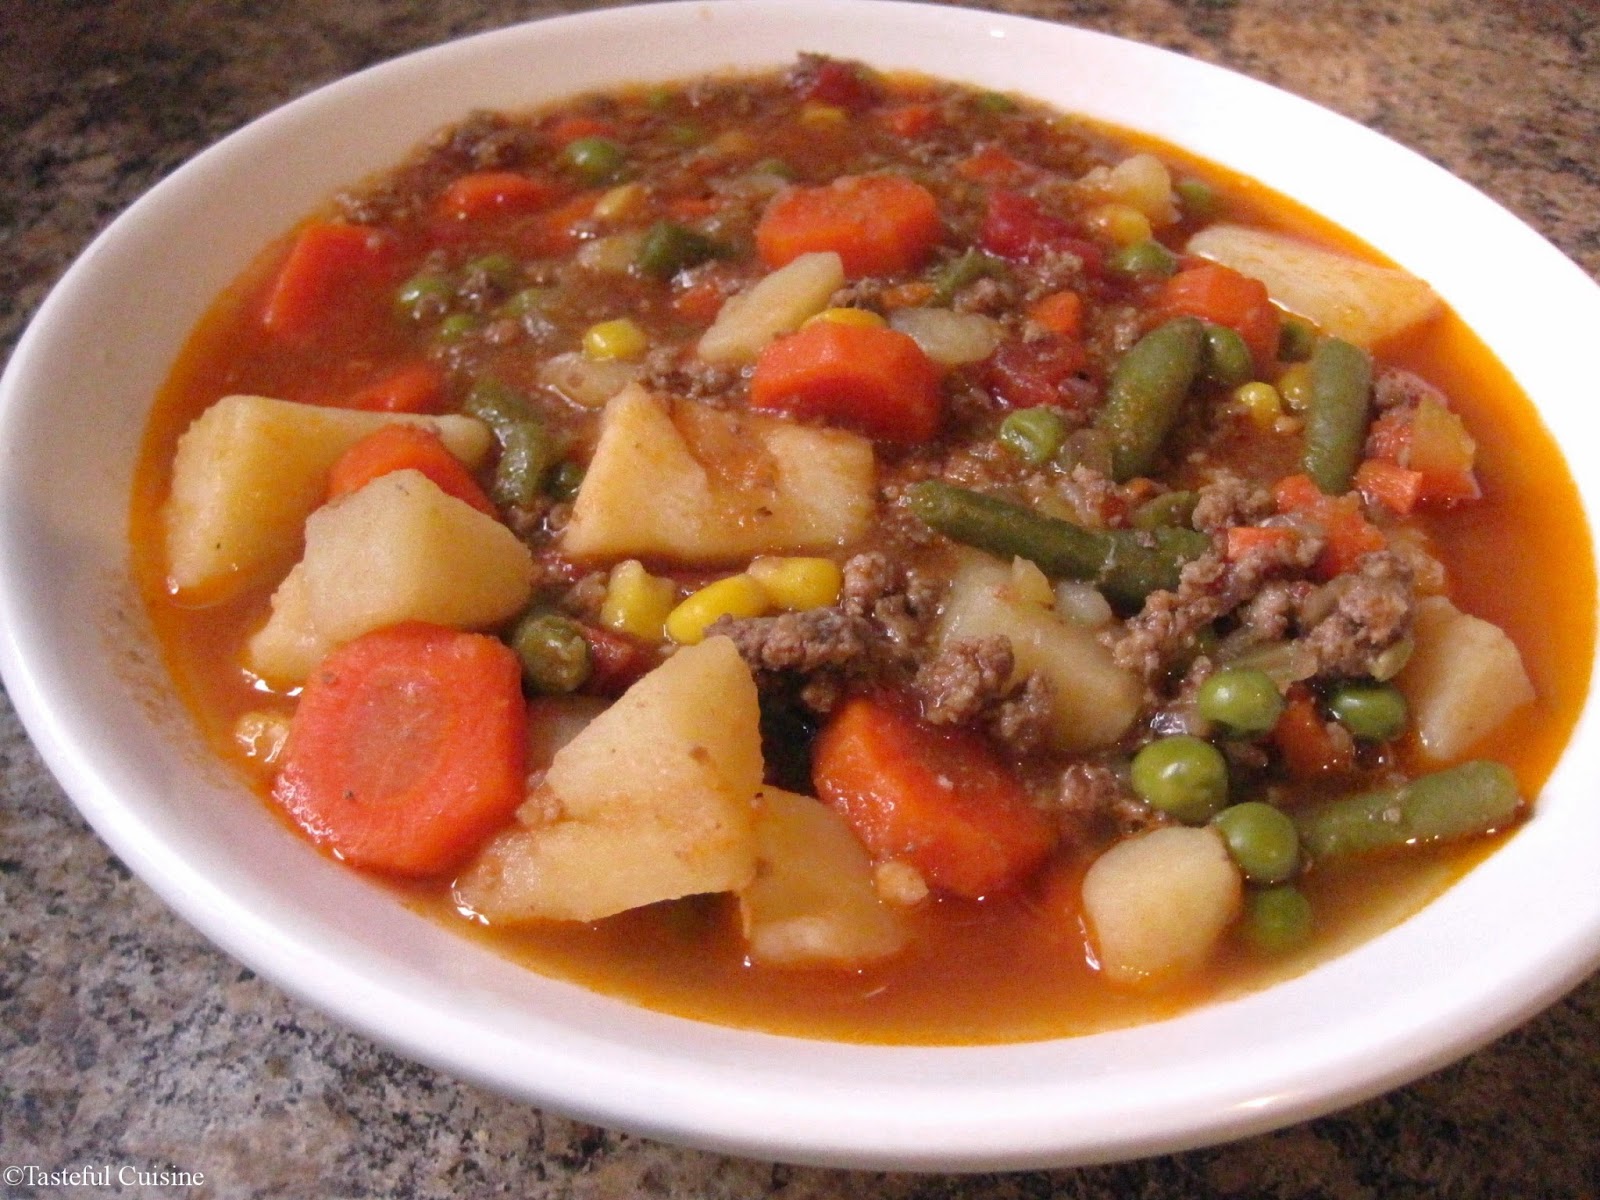
Vegetable Beef Soup

My personal take on a comfort food favorite: vegetable beef soup. Slow-simmered and full of flavor.

 
It's New Year's Eve and what am I doing? I've got my sweat pants on and am snuggled up in my favorite blanket watching cooking shows. Yep, New Year's Eve is a pretty uneventful holiday in our house. There's no staying up until midnight for us. Just food, TV, Wii games, and to bed at a normal time.

I was fortunate to take this week off of work. My husband is a teacher so I always try to plan to take some time off during his breaks. It's been a much welcome break this week to have some time to rest and recharge.

Lady has loved the extra snuggle time
I love having the time to cook more when I'm off and away from work. But, in case we make plans, I like to have plenty of leftovers so we can make a quick meal. I made a pot of this vegetable beef soup at the beginning of the week for us have on hand.We had it for dinner one night and will probably get two lunches out of it.

I've had many different kinds of vegetable beef soup. Most everyone I know has a rendition of it with some of the ingredients varying. It's the kind of soup you can make with whatever you have in your pantry/refrigerator. I've been known to make the soup without one or two of the vegetables and it still turns out great.


I wasn't always a fan of this soup. I've had a few versions that were awfully bland, so I have tweaked my version to be flavorful and satisfying. Start by browning the beef and sauteing the onions, celery, garlic, and tomato paste. Assemble the rest of the soup and throw it in the oven for a little over an hour. I like to simmer mine in the oven, but you can easily simmer it on the stove top or throw it in the crock pot and it will turn out just as good.

One thing I've discovered, is that it is best to let the soup rest after cooking for the best texture. I'm not sure if there is a scientific explanation behind it, but I have found that if I serve it immediately, the potatoes tend to fall apart. Once you've take it out of the oven, allow the soup to sit covered for about 20 minutes and uncovered for an additional 5. This allows the soup to cool to a more manageable temperature and the potatoes absorb some of the liquid and firm back up.


Soup always seems to taste better the second day, so this makes great leftovers!


Vegetable Beef Soup

Ingredients
  • 1 lb. ground chuck
  • 1 tablespoon canola or vegetable oil
  • 1 large onion, finely minced
  • 1 large stalk of celery, finely diced
  • 2 large cloves of garlic, smashed and finely minced
  • 1 tablespoon tomato paste
  • 1/2 pound carrots, peeled and diced
  • 1-14.5 ounce can cut green beans
  • 1-14.5 ounce petite diced tomatoes
  • 5-6 medium to large size potatoes
  • 1 cup frozen corn
  • 1 cup frozen peas
  • 32 ounces (4 cups) low-sodium beef broth
  • 1-2 teaspoons sugar
  • 4-5 bay leaves 
  • Salt and pepper to taste
Directions

1. Preheat oven to 300 degrees. In a dutch oven (5 quart size or larger), brown chuck over medium high heat. Break into small pieces as it browns (I like to use a potato masher to break it into even size pieces). Season with 1 teaspoon of salt. Pour beef into strainer and wipe dutch oven clean. Return dutch oven to stove top and heat canola oil over medium-low heat. Saute onions and celery until softened, about 5 minutes. Stir in garlic and cook until fragrant, about 30 seconds. Stir in tomato paste and saute for another minute or until the paste deepens in color.

2. Stir in green beans (including the green bean water from the can), diced tomatoes, carrots, potatoes, corn, peas, bay leaves, sugar, and pepper. At this point, I don't think it is necessary to add additional salt (since we seasoned the beef and the broth is already lightly salted). Taste at the end and see if it needs extra salt. Add in ground chuck and beef broth. Make sure everything is submerged under the broth and bring to a simmer. Once simmering, cover with the lid and transfer to preheated oven and bake for one hour and fifteen minutes.

3. Carefully remove the dutch oven from the oven and allow the soup to sit, covered for 15-20 minutes. Uncover and allow to cool for 5 minutes before serving. Taste and adjust salt and pepper, if needed. Serve with biscuits or crackers.

Yields: 6-8 servings

Source: Tasteful Cuisine (and adapted from the many vegetable beef soup recipes I've tasted).


Happy New Year! I wish you a happy and prosperous 2015.

Wednesday, December 24, 2014

Christmas M&M Cookies

Merry Christmas Eve! Here is a last minute cookie idea for your holiday baking.


One thing I have not been able to do much this month is bake. I've had a fairly busy month at work, and by the time I get home, baking is not what I want to do. It's kind of sad because Christmas cookie baking has always been one of my favorite traditions of Christmas. Sometimes it stinks being an adult and not having the time to do the things you want to do.

Okay, sorry about the pity party. This month has just flown by too fast for me to enjoy it! Thankfully I'll have a little time off these next couple of days and next week so I can do some late, holiday baking.

I did manage to bake these beautiful cookies for a Christmas party and Christmas program this last weekend. I decided to freeze an extra batch and baked some this afternoon for one our of Christmas dinners.


M&M cookies are one of my favorites and come in to a close second to my all time favorite: chocolate chip. For this recipe, I use my absolute favorite chocolate chip cookie recipe. I combine mini chips and holiday M&M's to create a beautiful Christmas cookie.


Christmas M&M Cookies

Ingredients

  • 2/3 cup shortening
  • 2/3 cup unsalted butter, softened to room temperature
  • 1 cup light brown sugar
  • 1 cup granulated sugar
  • 2 eggs
  • 2 teaspoons vanilla extract
  • 1/2 teaspoon salt
  • 1/2 teaspoon baking powder
  • 1/2 teaspoon baking soda
  • 3 cups unbleached, all-purpose flour
  • 1 cup mini-chocolate chips
  • 1-12 ounce bag holiday M&M baking bits
Directions

1. Preheat oven to 375 degrees. In a medium bowl, combine all dry ingredients. Set aside.
2. Using a hand or stand mixer (or a bit of elbow grease), cream butter and shortening together until combined. About one minute. Add the sugars and cream for an additional 3 minutes or until the mixture is light and fluffy. Stir in the eggs and vanilla and mix until incorporated and fluffy. Stir in dry ingredients until combined, do not over mix. Fold in the chocolate chips and M&M's
3. Roll cookie dough into tablespoon size balls. Place on a cookie sheet lined with parchment paper, spacing them 2 inches apart. Bake for 8-10 minutes or until lightly golden around the edges. Let cool on the cookie sheet for 1-2 minutes. Move cookies to a wire baking rack to cool.

Yields: About 5 dozen cookies


 Thank you for visiting and reading my blog! I appreciate all of my Tasteful Cuisine followers.
I hope you have a very Merry Christmas! 


Here is another Christmas cookie favorite...


Monday, December 15, 2014

Banana Blueberry Muffins

Moist banana muffins filled with juicy blueberries. Grandma's recipe for banana bread makes the perfect, quick breakfast!


I didn't mean to stay away from my blog for so long...It's been a busy couple of weeks! I've begun baking Christmas goodies and will have recipes to share soon. For now, I have this delicious muffin recipe.


This recipe is one I adapted from Grandmother. I have two great recipes for banana bread from both grandmother's (you can find the other banana bread recipe here). This recipe is from my paternal grandmother and is very rich and buttery. She always baked this in a loaf pan (since it is a bread recipe) but I occasionally will bake them as muffins to save time and give us something more "portable" to eat for breakfast. The recipe doesn't make a "pretty" bakery style muffin but once you bite into it, you won't care how it looks. The bananas create such a moist muffin that get softer the longer you store them. I love adding fresh blueberries to the bread but the bread is great on it's own as well.


Banana Blueberry Muffins

Ingredients
  • 3 ripe bananas, peeled and mashed
  • 3/4 cup butter, melted and cooled
  • 1 1/2 cups granulated sugar
  • 1 egg, room temperature and beaten (Grandma's original recipe calls for 2, but I prefer to use 1)
  • 1 teaspoon vanilla extract
  • 1/2 cup buttermilk, sour cream or Greek yogurt (I've tried all three and they all work fine)
  • 2 cups all-purpose flour
  • 1 1/2 teaspoons baking soda
  • 1 teaspoon salt
  • 6-8 ounces of fresh blueberries
Directions

1.  Preheat oven to 350 degrees. Spray muffins tins with cooking spray, set aside. In a medium bowl, mix together the flour, baking soda, and salt. Set aside.

2. In a large mixing bowl or stand mixer, mix together the mashed bananas, sugar, and butter until smooth and velvety. Stir in the eggs, vanilla, and buttermilk until well combined. Fold in the dry ingredients and stir until combined. Do not over mix. Stir in blueberries. Fill muffin cups 2/3 full with batter.

3. Bake at 350 degrees for 22-28 minutes until muffins are golden brown and inserted toothpick comes out clean. Allow muffins to cool in the pan for 10 minutes before turning out onto a cooling rack. Cool completely before serving or storing.

Note 1: Want to bake this in a loaf pan? Grease or spray a loaf pan and bake at 350 for 1 to 1 1/2 hours until golden brown and inserted toothpick comes out clean. Cool for ten minutes for inverting onto a cooling rack. 

Note 2: Overripe bananas are always best for banana bread. Bananas not ripened yet? Line bananas on a rimmed baking sheet (still in their peel) and bake in a 300 degree oven for 8-10 minutes. The peel should be lightly brown or have brown spots. Allow bananas to cool completely before peeling and mashing for the bread.

Adapted from my Grandmother