Wednesday, December 31, 2014

Vegetable Beef Soup

My personal take on a comfort food favorite: vegetable beef soup. Slow-simmered and full of flavor.

 
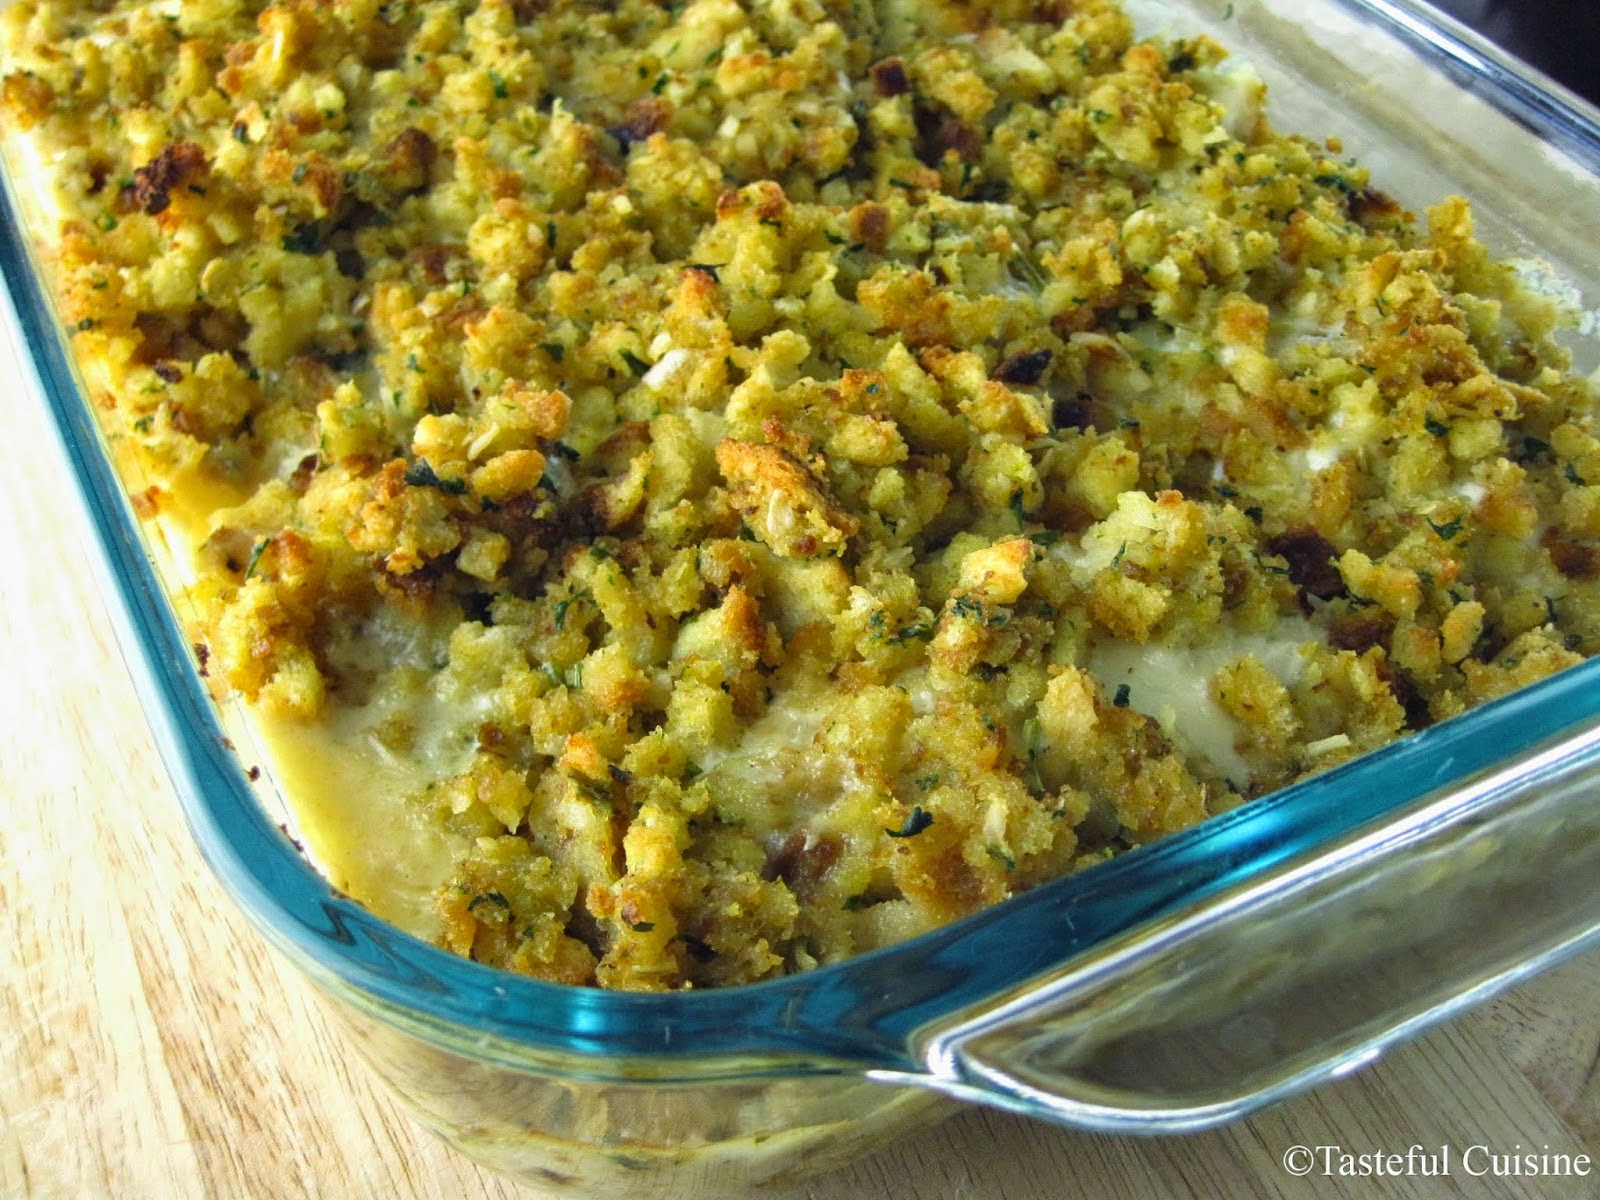
It's New Year's Eve and what am I doing? I've got my sweat pants on and am snuggled up in my favorite blanket watching cooking shows. Yep, New Year's Eve is a pretty uneventful holiday in our house. There's no staying up until midnight for us. Just food, TV, Wii games, and to bed at a normal time.

I was fortunate to take this week off of work. My husband is a teacher so I always try to plan to take some time off during his breaks. It's been a much welcome break this week to have some time to rest and recharge.

Lady has loved the extra snuggle time
I love having the time to cook more when I'm off and away from work. But, in case we make plans, I like to have plenty of leftovers so we can make a quick meal. I made a pot of this vegetable beef soup at the beginning of the week for us have on hand.We had it for dinner one night and will probably get two lunches out of it.

I've had many different kinds of vegetable beef soup. Most everyone I know has a rendition of it with some of the ingredients varying. It's the kind of soup you can make with whatever you have in your pantry/refrigerator. I've been known to make the soup without one or two of the vegetables and it still turns out great.


I wasn't always a fan of this soup. I've had a few versions that were awfully bland, so I have tweaked my version to be flavorful and satisfying. Start by browning the beef and sauteing the onions, celery, garlic, and tomato paste. Assemble the rest of the soup and throw it in the oven for a little over an hour. I like to simmer mine in the oven, but you can easily simmer it on the stove top or throw it in the crock pot and it will turn out just as good.

One thing I've discovered, is that it is best to let the soup rest after cooking for the best texture. I'm not sure if there is a scientific explanation behind it, but I have found that if I serve it immediately, the potatoes tend to fall apart. Once you've take it out of the oven, allow the soup to sit covered for about 20 minutes and uncovered for an additional 5. This allows the soup to cool to a more manageable temperature and the potatoes absorb some of the liquid and firm back up.


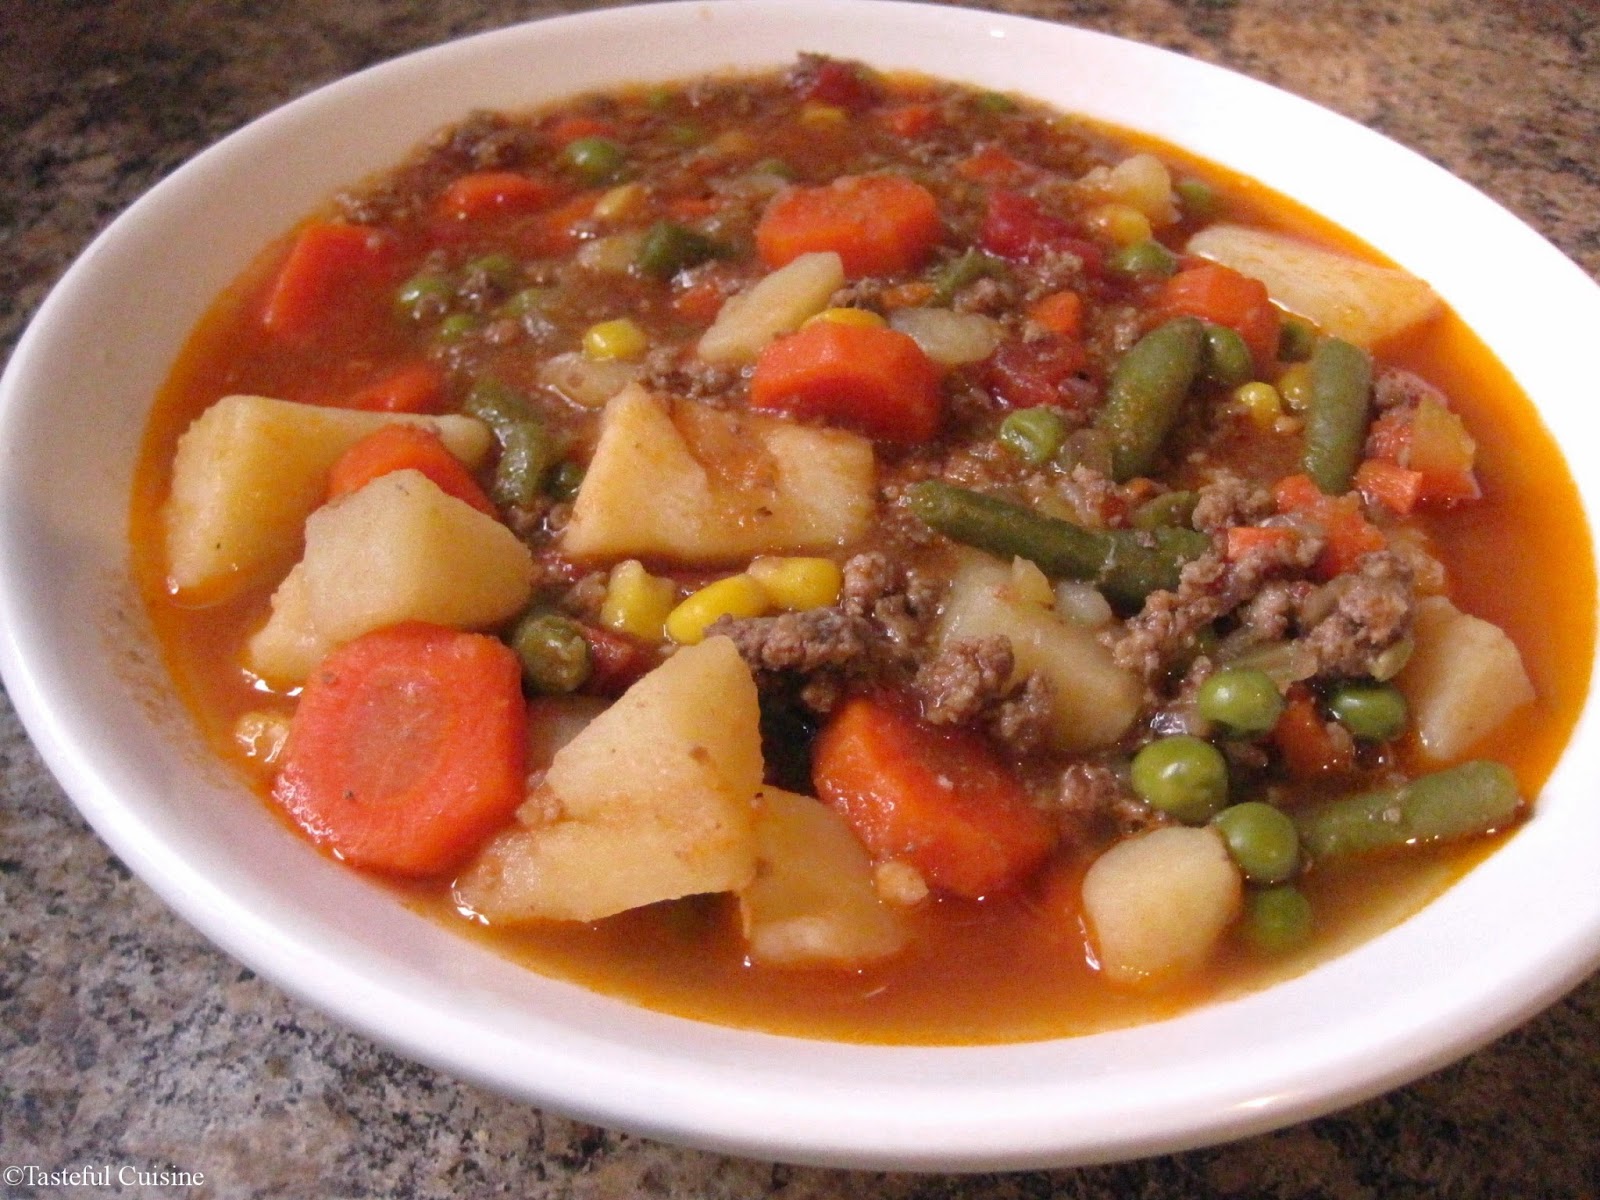
Soup always seems to taste better the second day, so this makes great leftovers!


Vegetable Beef Soup

Ingredients
  • 1 lb. ground chuck
  • 1 tablespoon canola or vegetable oil
  • 1 large onion, finely minced
  • 1 large stalk of celery, finely diced
  • 2 large cloves of garlic, smashed and finely minced
  • 1 tablespoon tomato paste
  • 1/2 pound carrots, peeled and diced
  • 1-14.5 ounce can cut green beans
  • 1-14.5 ounce petite diced tomatoes
  • 5-6 medium to large size potatoes
  • 1 cup frozen corn
  • 1 cup frozen peas
  • 32 ounces (4 cups) low-sodium beef broth
  • 1-2 teaspoons sugar
  • 4-5 bay leaves 
  • Salt and pepper to taste
Directions

1. Preheat oven to 300 degrees. In a dutch oven (5 quart size or larger), brown chuck over medium high heat. Break into small pieces as it browns (I like to use a potato masher to break it into even size pieces). Season with 1 teaspoon of salt. Pour beef into strainer and wipe dutch oven clean. Return dutch oven to stove top and heat canola oil over medium-low heat. Saute onions and celery until softened, about 5 minutes. Stir in garlic and cook until fragrant, about 30 seconds. Stir in tomato paste and saute for another minute or until the paste deepens in color.

2. Stir in green beans (including the green bean water from the can), diced tomatoes, carrots, potatoes, corn, peas, bay leaves, sugar, and pepper. At this point, I don't think it is necessary to add additional salt (since we seasoned the beef and the broth is already lightly salted). Taste at the end and see if it needs extra salt. Add in ground chuck and beef broth. Make sure everything is submerged under the broth and bring to a simmer. Once simmering, cover with the lid and transfer to preheated oven and bake for one hour and fifteen minutes.

3. Carefully remove the dutch oven from the oven and allow the soup to sit, covered for 15-20 minutes. Uncover and allow to cool for 5 minutes before serving. Taste and adjust salt and pepper, if needed. Serve with biscuits or crackers.

Yields: 6-8 servings

Source: Tasteful Cuisine (and adapted from the many vegetable beef soup recipes I've tasted).


Happy New Year! I wish you a happy and prosperous 2015.

Wednesday, December 24, 2014

Christmas M&M Cookies

Merry Christmas Eve! Here is a last minute cookie idea for your holiday baking.


One thing I have not been able to do much this month is bake. I've had a fairly busy month at work, and by the time I get home, baking is not what I want to do. It's kind of sad because Christmas cookie baking has always been one of my favorite traditions of Christmas. Sometimes it stinks being an adult and not having the time to do the things you want to do.

Okay, sorry about the pity party. This month has just flown by too fast for me to enjoy it! Thankfully I'll have a little time off these next couple of days and next week so I can do some late, holiday baking.

I did manage to bake these beautiful cookies for a Christmas party and Christmas program this last weekend. I decided to freeze an extra batch and baked some this afternoon for one our of Christmas dinners.


M&M cookies are one of my favorites and come in to a close second to my all time favorite: chocolate chip. For this recipe, I use my absolute favorite chocolate chip cookie recipe. I combine mini chips and holiday M&M's to create a beautiful Christmas cookie.


Christmas M&M Cookies

Ingredients

  • 2/3 cup shortening
  • 2/3 cup unsalted butter, softened to room temperature
  • 1 cup light brown sugar
  • 1 cup granulated sugar
  • 2 eggs
  • 2 teaspoons vanilla extract
  • 1/2 teaspoon salt
  • 1/2 teaspoon baking powder
  • 1/2 teaspoon baking soda
  • 3 cups unbleached, all-purpose flour
  • 1 cup mini-chocolate chips
  • 1-12 ounce bag holiday M&M baking bits
Directions

1. Preheat oven to 375 degrees. In a medium bowl, combine all dry ingredients. Set aside.
2. Using a hand or stand mixer (or a bit of elbow grease), cream butter and shortening together until combined. About one minute. Add the sugars and cream for an additional 3 minutes or until the mixture is light and fluffy. Stir in the eggs and vanilla and mix until incorporated and fluffy. Stir in dry ingredients until combined, do not over mix. Fold in the chocolate chips and M&M's
3. Roll cookie dough into tablespoon size balls. Place on a cookie sheet lined with parchment paper, spacing them 2 inches apart. Bake for 8-10 minutes or until lightly golden around the edges. Let cool on the cookie sheet for 1-2 minutes. Move cookies to a wire baking rack to cool.

Yields: About 5 dozen cookies


 Thank you for visiting and reading my blog! I appreciate all of my Tasteful Cuisine followers.
I hope you have a very Merry Christmas! 


Here is another Christmas cookie favorite...


Monday, December 15, 2014

Banana Blueberry Muffins

Moist banana muffins filled with juicy blueberries. Grandma's recipe for banana bread makes the perfect, quick breakfast!


I didn't mean to stay away from my blog for so long...It's been a busy couple of weeks! I've begun baking Christmas goodies and will have recipes to share soon. For now, I have this delicious muffin recipe.


This recipe is one I adapted from Grandmother. I have two great recipes for banana bread from both grandmother's (you can find the other banana bread recipe here). This recipe is from my paternal grandmother and is very rich and buttery. She always baked this in a loaf pan (since it is a bread recipe) but I occasionally will bake them as muffins to save time and give us something more "portable" to eat for breakfast. The recipe doesn't make a "pretty" bakery style muffin but once you bite into it, you won't care how it looks. The bananas create such a moist muffin that get softer the longer you store them. I love adding fresh blueberries to the bread but the bread is great on it's own as well.


Banana Blueberry Muffins

Ingredients
  • 3 ripe bananas, peeled and mashed
  • 3/4 cup butter, melted and cooled
  • 1 1/2 cups granulated sugar
  • 1 egg, room temperature and beaten (Grandma's original recipe calls for 2, but I prefer to use 1)
  • 1 teaspoon vanilla extract
  • 1/2 cup buttermilk, sour cream or Greek yogurt (I've tried all three and they all work fine)
  • 2 cups all-purpose flour
  • 1 1/2 teaspoons baking soda
  • 1 teaspoon salt
  • 6-8 ounces of fresh blueberries
Directions

1.  Preheat oven to 350 degrees. Spray muffins tins with cooking spray, set aside. In a medium bowl, mix together the flour, baking soda, and salt. Set aside.

2. In a large mixing bowl or stand mixer, mix together the mashed bananas, sugar, and butter until smooth and velvety. Stir in the eggs, vanilla, and buttermilk until well combined. Fold in the dry ingredients and stir until combined. Do not over mix. Stir in blueberries. Fill muffin cups 2/3 full with batter.

3. Bake at 350 degrees for 22-28 minutes until muffins are golden brown and inserted toothpick comes out clean. Allow muffins to cool in the pan for 10 minutes before turning out onto a cooling rack. Cool completely before serving or storing.

Note 1: Want to bake this in a loaf pan? Grease or spray a loaf pan and bake at 350 for 1 to 1 1/2 hours until golden brown and inserted toothpick comes out clean. Cool for ten minutes for inverting onto a cooling rack. 

Note 2: Overripe bananas are always best for banana bread. Bananas not ripened yet? Line bananas on a rimmed baking sheet (still in their peel) and bake in a 300 degree oven for 8-10 minutes. The peel should be lightly brown or have brown spots. Allow bananas to cool completely before peeling and mashing for the bread.

Adapted from my Grandmother

Wednesday, November 26, 2014

Thanksgiving Recipes

Thanksgiving is tomorrow and I couldn't be more excited. Thanksgiving combines two of my favorite things: food and family. There's nothing like sitting around the table and sharing a delicious meal with those you are closest to.

While, I do not host a Thanksgiving dinner. I do have three family thanksgiving dinners to attend. I'll be making pies and side dishes for all three of them! I don't have a large repertoire on my blog yet, but I thought I'd share a few of my Thanksgiving recipes.

No Thanksgiving is complete without a pie. Here is my go to pie crust recipe:


Making pumpkin pie and want to make your own pumpkin puree? It's so easy!


This is the traditional pie recipe that I use:


Or maybe you prefer to be nontraditional and skip the pie. Here is a delicious recipe for pumpkin roll.


I recently tried this pumpkin pie recipe and it was superb!

This is my favorite recipe for stuffing. It can be prepared  a day ahead and refrigerated until you're ready to bake it.

Need a way to use up leftover stuffing? Try it with my chicken and stuffing casserole.


Have a Happy Thanksgiving!

Monday, November 3, 2014

French Bread Pepperoni Pizza

Need a quick dinner idea? Love pizza, but don't have the time to make a homemade crust? Try this quick and easy French bread pizza. 


I posted a recipe for my homemade pizza sauce last week so I figured I needed to post a recipe that you can use it for! Growing up, my mom would occasionally make us this French bread pizza. It's super simple and you don't have to deal with the hassle of making a crust.

I for one, love a good homemade pizza crust but I don't always have time to make the bread dough. For a good pizza, in a short amount of time, I will whip out one of these French bread pizzas.


It's so simple: pick up a loaf of French bread at your supermarket's bakery, slice it lengthwise in half, brush with a little olive oil, toast it for a few minutes in the oven, add your toppings, pop back in the oven and bake until cheese is bubbly and bread is golden.


Simple right?

French Bread Pepperoni Pizza

Ingredients
  • 1 loaf of French bread
  • Extra virgin olive oil
  • Pizza Sauce 
  • 4-6 ounces of mozzarella, shredded
  • Pepperoni
Directions

1. Preheat oven to 425 degrees. Slice French bread in half lengthwise. Place onto a rimmed baking sheet (I usually brush a little olive oil onto the pan underneath the bread). Brush the tops of the bread with a little olive oil. Toast in the oven for about 5 minutes.

2. Top French loaves with pizza sauce, mozzarella, and pepperoni. Return to oven and bake for about 8-10 minutes or until cheese is melted and bubbly. Cool for 5 minutes before slicing and enjoying.

Note: Pizza can be made with a variety of toppings. If using additional cheese or toppings, hollow out a little bit of the loaf so that it can hold all of the toppings.


Monday, October 27, 2014

Homemade Pizza Sauce

Homemade pizza sauce: fresh, tasty, and ready in less than 30 minutes!


I love a good, homemade pizza. The most important thing next to the crust is the sauce. I'm one of those that likes a good amount of sauce on my pizza. If it doesn't have enough, I need a little extra for dipping.

It really only takes a few good ingredients to make an excellent sauce: crushed tomatoes, onion, garlic, olive oil, red pepper flake, basil, and oregano. I've included the measurements for both dry and fresh herbs. Just remember, if using dry herbs: add them to the sauce at the beginning of the simmering stage. Dry herbs can withstand longer cooking times and actually need the simmering time to bloom their flavors. Fresh herbs are more fragile and need to be added at the very end to preserve the fresh flavor and appearance.

I actually took a little hiatus from making my homemade pizza sauce, until recently. I found a store bought brand that actually tasted pretty close to homemade. It became my favorite sauce until recently when our grocery store stopped carrying it! Of course, that always happens when I find something I really like. It's okay, homemade sauce is always best. Plus, this recipe is easy to make ahead and freezes really well.This recipe makes the equivalent of two jars of the other sauce I was using. I generally use half of this sauce for our pizza and freeze an extra jar for a future use.


Homemade Pizza Sauce

Ingredients
  • 1 tablespoon extra-virgin olive oil
  • 1/2 a large onion, diced finely
  • 2 cloves garlic, smashed and chopped finely
  • 1 1/2 teaspoons dried oregano, or 3 teaspoons of fresh basil
  • 1/8-1/4 teaspoon red pepper flake
  • 1-28 ounce can of crushed tomatoes
  • 1/2 teaspoon dried basil, or 1 teaspoon fresh basil
  • 1 teaspoon sugar
  • Salt and pepper, to taste
Directions

1. In a medium size saucepan, heat one tablespoon of olive oil over medium heat. Add finely chopped onions, and saute for about 5 minutes. Add garlic, oregano, and red pepper flake and saute for about 1 minutes or until fragrant. Adjust heat to medium/low and add crushed tomatoes. Stir in sugar, basil (if using fresh, add at the very end), salt, and pepper. Cover and simmer for 10-15 minutes until slightly thickened.

2. Allow sauce to sit uncovered for 10 minutes to cool slightly before using. Sauce will thicken slightly as it stands. Use immediately for pizza or cool completely and store in jars in refrigerator or freezer.

From Tasteful Cuisine

Need some tips on preserving oregano and other herbs? Now is the time to start harvesting your herbs for winter!


Monday, October 13, 2014

Pumpkin Roll with Cream Cheese Filling

A delicious pumpkin cake, rolled up and filled with a rich cream cheese filling. It's surprisingly simple and easy to make!


Today is Columbus Day and I've had a wonderful day off at home. It's been rainy here the last couple of days, so it's been the perfect weather to stay in and get some things done. I now have a clean house, dinner in the crock pot, and a freshly baked pumpkin roll to enjoy for dessert.

I have not had a pumpkin roll in a long time and I decided it was time to resurrect this recipe. Pumpkin recipes are all over the internet and food blogs right now. I like traditional pumpkin recipes (pumpkin pie, pumpkin bread, etc.) but I don't get as creative with pumpkin as I have seen other bloggers do. So you will  see a few pumpkin recipes from me this fall, but nothing too nontraditional.


Pumpkin Roll with Cream Cheese Filling

Ingredients

Cake:
  • 3/4 cup all-purpose flour
  • 1/2 teaspoon baking powder
  • 1/2 teaspoon baking soda
  • 1/2 teaspoon ground cinnamon
  • 1 teaspoon pumpkin pie spice 
  • Dash of salt
  • 3 eggs, room temperature
  • 1 cup sugar
  • 2/3 cup pumpkin puree
  • 1/4 cup powdered sugar 

Filling:
  • 1-8 ounce package of cream cheese, softened
  • 6 tablespoons unsalted butter, softened
  • 1 cup powdered sugar
  • 1 teaspoon vanilla extract
  • Dash or two of salt
  • Powdered sugar for decorating, optional
Directions

1. Preheat oven to 375 degrees.  Grease a Jelly Roll pan with shortening and line with parchment paper. Grease and flour the parchment paper. Sprinkle a thin, dish towel with powdered sugar.

2. In a medium bowl, mix together the flour, baking powder, baking soda, cinnamon, pumpkin pie spice, and salt. Set Aside. Using a stand or hand mixer, beat eggs and sugar together until thick and creamy. Beat in pumpkin puree.

3. Pour batter into pan and bake for 13-15 or until the top of the cake springs back when touched with finger or toothpick (cake may bake faster if using a dark, non-stick pan). Remove from oven and loosen cake around the edges with knife. Immediately turn cake onto prepared towel. Starting with the narrow end, roll up cake and towel together. Cool completely on a wire rack.

4. Using a stand or hand mixer, whip together the cream cheese and butter until creamy. Slowly mix in the powdered sugar and salt and whip on medium speed until fluffy, about 2 minutes. Stir in vanilla.

5. Carefully unroll cake and evenly spread filling over the cake. Roll cake back up and cover tightly with plastic wrap. Refrigerate for one hour before serving. Decorate with additional powdered sugar, if desired.


Slightly Adapted from Libby's

Wednesday, October 8, 2014

Chicken Salad Sandwiches

Freshly baked chicken, tossed with grapes, celery, red onion, and a delicious homemade dressing. These sandwiches are perfect for a party or a way to dress up your weekly lunch routine!


I originally got this recipe for chicken salad sandwiches from my mom. She received the original recipe from a friend several years ago and made her own changes to the recipe. I have since made adjustments to my mom's version. I remember when I first saw the recipe, it sounded like such a strange combination. Chicken, grapes, red onion, celery and walnuts all mixed together with mayo and other seasonings/condiments. Once I took a bite I was hooked. The salad is so fresh tasting and satisfyingly filling with all the protein and fresh fruit/veggies. The addition of walnuts adds a nice crunch to the salad. I sometimes omit the walnuts if I am taking these sandwiches to a get together (just in case someone is allergic). The sandwiches still taste great with or without them.


I hosted a baby shower over the weekend for my sister-in-law. I kept the menu relatively simple: Chicken salad sandwiches, fruit salad, a veggie tray, Mexican tortilla pinwheels (made by my Mother-in-law) and a chocolate cake. Most everything I was able to make ahead of time and finish preparing the day of. I did prepare this chicken salad that morning, as I don't like it too chilled (the chicken tastes best when it is still fresh) but it does keeps well if you need to make it ahead of time.


The recipe is relatively simple. Simply, baked up some boneless, skinless chicken breasts. Allow them to cool for 10-15 minutes or until cool enough to handle. Cut the chicken into small cubes and toss with celery, red onion, and red grapes. For the dressing mix together: mayonnaise, cream cheese, Dijon mustard and black pepper. Pour the dressing over the chicken and stir until coated. You may need to add a little more mayonnaise if it looks dry. I always prefer to start with the smallest amount possible and go from there.

I like to serve the chicken salad on a nice, buttery croissant roll. Cut in half or smaller desired portions and secure the sandwich with a toothpick. These little sandwiches are perfect for a baby/wedding shower or nice luncheon.

Chicken Salad Sandwiches

Ingredients
  • 3-4 boneless skinless chicken breasts, about 4 cups cooked (3 if they are large, 4 if they are smaller in size)
  • 1-2 tablespoons finely chopped red onion
  • 1 stalk celery, finely chopped
  • 1 cup red grapes, halved
  • 1/2 cup mayonnaise
  • 2 tablespoons cream cheese, softened
  • 2 teaspoons Dijon mustard
  • 1/2 toasted walnuts, chopped (optional)
  • Salt and Pepper to taste
Directions

1. Preheat oven to 400 degrees. Lay chicken breasts on baking sheet and cover with plastic wrap. Pound chicken breasts until even thickness. Remove plastic wrap, discard. Sprinkle both sides of the chicken breasts with a little salt. Bake chicken for about 20 minutes or until fully cooked. Remove from the oven and allow chicken to rest for about 10 minutes or until cool enough to handle. Cut chicken into cubes. Cooked chicken should measure about 4 cups.

2. In a large mixing bowl, toss together the chicken, grapes, celery, and red onion. In a smaller bowl, mix together the mayo, cream cheese, Dijon, and black pepper. Pour the dressing over the chicken and toss to coat. If needed, add more mayo to desired consistency.

3. Refrigerate for one hour before serving. Taste before serving and adjust salt and pepper if needed. Serve on croissants or desired bread of choice.

Monday, September 29, 2014

Oven Barbequed Chicken Legs

Oven roasted chicken covered in tangy barbeque sauce. A quick and easy main course that is ready in 30 minutes!


I hesitated to post this recipe because of it's overly simple nature. But then, I think of how some of the simple, good recipes are hard to come by. It's so easy to fill my recipe box with dinner ideas that take one, two, or even three hours to prepare. That time frame isn't possible for a busy weeknight--I have to have a good repertoire of easy, go-to meals.

So today I am sharing with you oven barbeque chicken. You can follow the same recipe and cook the chicken on a barbeque grill if you wish. I prefer the oven because I think it's more time consuming to prepare our grill (we have a charcoal grill) so I opt to do my "barbequing" inside.

Chicken legs are one of my favorite cuts of the chicken and they are relatively inexpensive. So I think they make a great low-budget and fast meal. Growing up, my favorite meals my mom prepared was her homemade fried chicken. My mom would cut a whole chicken, fry it and serve it with mashed potatoes and gravy. We are a family of five, so that meant we ate every piece of chicken and sometimes we didn't get a choice of what cut we got. My brothers and I often fought over the legs--our favorite piece out of them all. Since there were three of us, and only two legs, that meant someone would miss out. Mom would often make us take turns on who got the leg. If you missed out that time, you would get a leg the next time she fixed fried chicken. As we got older (and...ate more) she would generally buy an extra package of chicken legs and fix them. Everyone got a leg (or two) and was happy. I guess I've always preferred the leg because dark meat is more tender and flavorful. I tend to fix a lot of boneless, skinless chicken breasts out of convenience and simplicity, but I think the dark meat is the best cut.

This recipe takes very little prep work. While the oven is heating up, clean up the chicken legs as needed--you can leave the skin on or remove it. Sprinkle with a little salt and pepper (season under the skin as well) and arrange on a foil-lined baking sheet (the foil makes for easy clean up). Always allow meat to sit for at least 5-10 minutes after salting because it allows the salt to absorb into the meat and tenderize and season it. Once the oven is to temperature, pop the chicken in the oven onto the middle rack and allow the chicken to cook until it's almost cooked through. Remove the chicken about five minutes away from done time. Brush on your favorite barbeque sauce and return it to the oven. Be generous with the sauce--it will bake and caramelize so you need a good amount. Serve with extra barbeque sauce if desired.

And there you have it, easy barbeque chicken in under thirty minutes!

Oven Barbeque Chicken Legs

Ingredients 
  • 2 lbs, skin-on chicken legs
  • 3/4 teaspoon table salt*
  • 1/2 teaspoon black pepper
  • 1/2-1/3 cup barbeque sauce, store bought or homemade
Directions

1. Preheat oven to 400 degrees. Line a baking sheet with heavy duty aluminum foil, set aside. Remove chicken legs from package and trim away any excess fat or skin. Remove skin if desired or leave intact. Lightly season with salt and pepper--if leaving the skin on, carefully peel the skin back, season with salt and pepper and then lay the skin back in place. Arrange legs on baking sheet, spacing two inches apart.

2. Bake chicken legs for about 20 minutes. Remove from oven and brush chicken with barbeque sauce using a pastry brush. About one heaping tablespoon per leg. Return to oven and bake an additional 5 minutes or until chicken is done. To test chicken with a kitchen thermometer. Insert thermometer into chicken leg as close to the bone as possible without touching the bone. Fully cooked chicken should register 165 degrees. Serve chicken with additional barbeque sauce, if desired.

*Measurements for salt and pepper are approximate. I always grab a little using my fingers and lightly and evenly sprinkle over the meat. It really doesn't take much to season well. However, I am a low salt cook, so if you feel it needs more, add more. Just keep in mind that the barbeque sauce will add some seasoning as well.

Yields: 4-5 Servings (two chicken legs a piece)

Friday, September 12, 2014

Baked Chicken and Stuffing Casserole - An Update

Baked chicken topped with Swiss cheese, homemade cream of chicken sauce and stuffing. It's one of my most popular recipes on my blog so far!


I posted this recipe for chicken and stuffing casserole last year. Since starting my blog, this casserole recipe has been one of my most viewed recipes. I made a few minor changes (added cheese, took some new photos and explained my technique a little better). I always aim to improve my recipes and plan to share with you as I update them.

The weather is supposed to remain cool the next few days. This would be the perfect casserole for a hearty, evening meal!

Baked Chicken and Stuffing Casserole

Wednesday, September 10, 2014

Oven-Baked Chicken Nuggets

Crispy, oven-baked chicken nuggets covered in toasted Panko breadcrumbs. A satisfying main dish for adults and kids alike!


Chicken nuggets: they can either be delicious or done horribly wrong. I very rarely eat a fast food chicken nugget because of the way they are made.  Chicken nuggets should be simple: small bite size pieces of white meat chicken. Not, a chicken patty made of chicken pieces smooshed together in an odd nugget shape. I refuse to eat those types of nuggets.


This recipe consists of chicken breasts (or tenderloins) cut into small pieces and covered in crispy Panko breadcrumbs. No mystery ingredients. Just plain and simple.


I use Panko breadcrumbs because they give the perfect crunch to oven-baked "fried" chicken. The only problem is that Panko is rather white and only lightly browns when it is baked for less than 15 minutes. I toss mine into non-stick skillet and toast the crumbs to get them golden before using. The light toasting enhances the flavor and gives the exterior a beautiful golden color. I will emphasize that it only needs a light toasting--about five minutes and they are good. Once they are golden, remove them from the heat. The crumbs can easily begin to burn so watch them carefully!

I set up a small "assembly" station to make the nuggets. You will need three shallow dishes--I use casserole dishes and pie plates. Each dish is as follows:

Dish #1: flour, garlic powder, salt, pepper, and paprika
Dish #2: one egg, beaten
Dish # 3: toasted Panko breadcrumbs

On a cutting board, I cut one pound of chicken tenderloins into 1 to 1 1/2 inch pieces. Sprinkle the chicken with a little salt and pepper. Dredge the chicken in flour, shake off the excess. Dip into the egg mixture and then into the Panko. Cover with the Panko and then set onto a baking sheet that has been sprayed with cooking spray. Once all the nuggets are on the tray, spray the tops with a little oil and pop into the oven. After 7 minutes, turn over and bake an additional 5-7 minutes or until done (time will depend on the size of the chicken).

Serve chicken immediately with your favorite dipping sauce.

Oven-Baked Chicken Nuggets

Ingredients
  • 1-lb. fresh, chicken tenderloins or breasts
  • 1 1/2 cups Panko breadcrumbs
  • 1 large egg, beaten
  • 1/3 cup all purpose flour
  • 1/2 teaspoon paprika
  • 1/2 teaspoon salt
  • 1/2 teaspoon ground black pepper
  • 1/4 teaspoon garlic powder
  • Non-stick cooking spray, such as: Pam, olive or canola oil
Directions

You will need three shallow casserole dishes or pie plates. The chicken nuggets have a three dip assembly and each item needs to be kept separate. 

1. Preheat oven to 400 degrees. Spray a baking sheet with non-stick cooking spray and set aside. On a cutting board, cut chicken into 1-1 1/2 inch pieces. Sprinkle evenly with a little salt and pepper (about 1/2 teaspoon of each) and set aside.

2. To toast breadcrumbs: heat a non-stick skillet over medium high heat. Toast Panko breadcrumbs in the skillet until golden brown, about 5-7 minutes. Stir Panko every ten seconds or so, making sure the breadcrumbs do not burn. Transfer to a shallow dish. In the second dish, mix together the flour, paprika, salt, pepper, and garlic powder. In third dish, crack one egg and beat well.

3. To make nuggets: take seasoned nuggets and dredge lightly in flour, shaking off any excess. Dip the floured chicken into the egg, allow any excess to drip off and then dip into the Panko. Press the Panko onto the chicken and transfer to prepared baking sheet. Spray the tops of the chicken nuggets with a little oil to set the crumbs.

4. Bake in a preheated 400 degree oven for about 12-14 minutes. After 7 minutes of baking, remove pan from oven and carefully flip chicken over. Return pan to oven and bake the additional 5-7 minutes or until done. Cooking times will vary on the size of chicken pieces you are cooking. Chicken should register 165 on a instant read thermometer and be golden brown. Allow to cool slightly before serving.

Yields: 4-6 Servings

Wednesday, September 3, 2014

Pasta Salad

Fresh veggies and perfectly cooked pasta tossed together with Italian dressing and Parmesan cheese. It's one of my favorite summer salads!


I hope everyone had a relaxing holiday weekend! My husband has been back to work for about 3 weeks now (he's a school teacher), so it was nice to have a few days off with him.

Now that Labor Day is gone, summer is officially winding down. This recipe is a summer barbeque favorite of mine. I use a variety of summer vegetables: grape tomatoes, cucumbers, bell pepper, red onion, and carrots. Chop them into bite size pieces, toss with cooked rotini and the Italian dressing of your choice. Delicious and simple!

All of the vegetables need to be washed and dried well before assembling the salad. When chopping up the vegetables, leave pieces that are all similar in size as shown below.

Grape tomatoes: slice lengthwise in half, Cucumber: Halfway peeled, sliced and then cut into fourths, Red Onion: Diced, Carrots: Peeled and diced, Bell Pepper: Diced

While prepping the vegetables, boil the pasta according to package directions. Do not overcook the pasta! I can't emphasize the importance of this. Nothing ruins a good pasta dish like mushy, overcooked pasta. I always go by the "al dente" directions on the box, sometimes even a minute less. You want your pasta to have a little resistance when you bite into it. Once you toss warm pasta with sauce or dressing, it absorbs the liquid and softens the pasta a little more. When in doubt, under cook it just a tad.

Once everything is prepped and the pasta is done, toss the veggies, pasta, and dressing in a large mixing bowl. I start by adding about 1/4 of the bottle of dressing (sounds like a lot, but this is a big salad). The pasta will absorb the dressing as it chills, so adjust as needed. Chill the salad for at least two hours before serving. Once it is chilled, give the pasta a quick stir (dressing tends to fall to the bottom) adjust dressing as needed and top with freshly grated Parmesan cheese. I think I ended up using about 1/3 of the bottle of dressing. Of course, a homemade Italian dressing will work just as well. Use whatever you like.


Serve this pasta salad with your favorite barbeque or summer foods. But watch out, it's easy to fill up on this salad! I could make a complete meal out of it.

Pasta Salad

Ingredients
  • 1-12 ounce package of rotini, cooked according to package directions (I prefer the pasta al dente)
  • 1 small package of grape tomatoes, sliced in half
  • 1 cucumber, halfway peeled, sliced and then cut into fourths
  • 1/2-3/4 red onion, diced
  • 3 carrots, peeled diced
  • 1 green bell pepper, diced
  • Italian dressing of your choice (I prefer a robust Italian dressing)
  • Freshly grated Parmesan cheese for garnish

Directions

1. Boil pasta according to box directions, leaving al dente or slightly firm. Drain pasta well.

2. While pasta is cooking, wash and prep your vegetables. Allow vegetables to drain well, or dry with paper towels. Chop vegetables so that they are all similar in size.

3. Toss pasta, vegetables, and Italian dressing together.  I start with 1/4 of the bottle of dressing and adjust as needed. Refrigerate for at least two hours or until well chilled. Stir and taste before serving. Adjust dressing if needed. Garnish with grated Parmesan cheese and serve.

Saturday, August 30, 2014

Chipotle Sauce

Creamy, spicy chipotle sauce. A versatile condiment that is easy to make!


I made fish tacos for the first time the other night. Which, I don't know how I went so long without trying them. So good. Seriously, they were a cinch to make and a nice break from the traditional tacos that I make. I do have to make a few tweaks to my recipe before I post it, but hopefully it will make the blog in the near future.


Since I was trying to stray from my traditional taco recipe, I did not want a sour cream and salsa topping. I whipped up this spicy, chipotle sauce and it gave the tacos the right amount of kick.

With this sauce, you can control the amount of spice you want. If you don't want it to be overly spicy, don't add as much chipotle pepper or adobo sauce. If you do want it to be extra spicy, you may want to add more. I made it in the middle, not too spicy, not too mild. I think it's just right.

I used plain nonfat Greek yogurt and mayonnaise. I feel that the yogurt by itself would be a little too tangy, so I used a combo of both. If you don't have Greek yogurt, regular plain yogurt or sour cream would be good substitutes. In a blender, mix together the yogurt and mayo with some freshly chopped garlic, a dash of salt, and two chipotle peppers in adobo sauce. I also add in a little bit of the adobo sauce (other than what's already on the pepper). Throw those ingredients into a blender with a splash of lime juice (The lime juice adds a nice fresh flavor. I only used a quarter of a lime, but add as much as you would like!). Blend well, scraping down the sides as needed. It took a couple of minutes to get it blended well, as I had to scrape down the sides a couple of times to get everything incorporated and the chipotle peppers chopped up.

Transfer the sauce to an airtight container and lick the blender clean. Okay, maybe don't lick it, but scrape out every bit of sauce you can. Store sauce in the fridge for up to a week.

Drizzle this sauce over fish, fish tacos, sandwiches, salads-there are so many possibilities for this sauce!

Chipotle Sauce

Ingredients
  • 1/2 cup plaint, nonfat Greek yogurt
  • 1/2 cup mayonnaise
  • 2 chipotle peppers in adobo sauce, coarsely chopped + 1 teaspoon of the sauce
  • 1 clove of garlic, finely minced
  • Dash of salt
  • Freshly squeezed lime juice-I used 1/4 of a lime

Directions

1. In a blender, combine the yogurt, mayo, chopped chipotle peppers, garlic, salt and lime juice. Blend sauce until combined, scraping sides as needed. Taste to adjust lime, salt, and adobo sauce.

2. Store sauce in an airtight container in the refrigerator up to one week. Sauce goes great with fish, chicken, sandwiches, salads and anything else you think it'd be good on--use your imagination!

Wednesday, August 20, 2014

Couscous with Garlic & Scallions

Fluffy couscous with garlic and scallions. It's the perfect side dish that's ready in 10 minutes or less!


Couscous is similar to rice but smaller in size. I tried it for the first time two years ago and it become an instant favorite. It has a very light, almost buttery texture. I sometimes prefer to make couscous over rice because it's quick and easy. Rice can be kind of tricky to make: I either get it perfect or get it too soft. Couscous is very easy to prepare--I don't feel like you can mess it up.

Simply saute some garlic and scallions (green onions) in butter until fragrant. Add water, salt, and pepper and bring to a boil. Once it's boiling, add the couscous, give it a quick stir and cover. Let the couscous sit off the heat for 5 minutes until all the water is absorbed. Fluff the couscous with a fork and it is ready to serve! Seriously, so easy...

I developed this recipe while developing a recipe for garlic-lime chicken (recipe to come). The citrus flavors of the marinade I used needed something light to accompany it. I thought couscous was the perfect pairing. I have kept this recipe simple so that it can accompany the fresh flavors of the garlic and scallions. This dish is very versatile and can be paired with many dishes. I think it goes best with chicken or fish. I prefer using scallions in this recipe because they give a light onion flavor without being overpowering.

Speaking of scallions. I hate to admit this, but for the longest time I didn't realize scallions and green onions were the same thing. I would watch cooking shows and the chefs would be like: "chop some scallions" and I would get discouraged because I could never find "scallions" in the store I could only find "green onions." The green onions looked like the exact same thing they were using, but I figured scallions were an onion that were not available in my area(I live in a small Midwest town where it is hard to find certain ingredients). Nope, scallion is just a different word for green onion. It depends on the area you are from, but both names are for this the same onion. Occasionally you will run across multiple names for the same food. Another area of the country may call an ingredient a name completely different than what you know it as. You just have to do a little research(in my case, Google) to see if it's the same ingredient.

Okay, enough of my embarrassing story. Try this couscous!

Couscous with Garlic & Scallions

Ingredients
  • 1 tablespoon unsalted butter
  • 1 large clove of garlic, finely minced
  • 3 scallions, finely chopped
  • 1 cup water
  • 3/4 cup couscous
  • 1/4 teaspoon salt and pepper, adjust as needed
  • 2 tablespoons freshly chopped parsley

Directions

1. In a medium saucepan, melt butter over medium heat. Add chopped scallions and garlic and stir. Saute for 2 minutes or until fragrant. Stir in water, and a little salt and pepper. Once water begins to boil, add couscous and stir just to incorporate. Cover.

2. Turn off the burner and allow the couscous to sit, covered, for 5 minutes. Refer to package directions as well, times may varies for different varieties of couscous.

3. Uncover and fluff couscous with a fork. Serve with chicken or fish.


Sunday, August 10, 2014

Vietnamese Food and The End of Summer

Thursday night we had a feast of Vietnamese food. Our small town is home to a Vietnamese college and every year they host a celebration called "Marian Days." Marian Days is an American Roman Catholic celebration that draws approximately 60,000 people from all other the U.S. and Vietnam (quite a number for our small city of 14,000). During this weekend of celebration, they have several food tents and markets set up for the public to eat and shop in. While I have lived here my entire life, I have not been to Marian days for probably twenty years. My family decided to venture out this weekend and try the food. This is what we had:

Pho - It was very good! The soup was full of herbs: basil, cilantro and mint. There were also sprouts, scallions, jalapenos, rice noodles and beef. It was finished off with a squeeze of fresh lime juice over the top. The soup was very honest and full of flavor.


Spring Rolls - Every food tent had some form of spring roll. These were a simple roll of rice, shrimp, beef and lettuce. The dipping sauce was very different and unlike anything I had tasted before.


Rambutan - I tried this fruit for the first time in Costa Rica, ten years ago. I spotted the Rambutan at their market and immediately recognized them as the same fruit. To eat, you simply peel off the exterior to expose the fruit inside. I think they are similar to a white grape in taste/texture.


Boba Tea - For dessert, we tried Boba tea.  I didn't get a picture of the drink, but they look like a typical fruit smoothie with Boba beads in the bottom of the cup. The Boba is a tapioca like bead that has a very chewy texture. I wasn't fond of the texture of the Boba, but the smoothie tasted good!


All in all, it was a fun experience. We plan to make this a yearly tradition instead of once every 20 or so years. It's funny how we often don't take advantage of the events that go on in our own hometown. It's easy to say, "there's nothing to do here!" When really, if you get involved, there's plenty to do--it just depends if you really want to look for things to do. I have been guilty of this many times.

Summer comes to an end...


This is our last summer weekend--my husband will be back to school next week. Not sure if I'm ready for summer to end (it feels like it just started).  If you are starting back to school next week, enjoy your last weekend of freedom!

*In an effort to share more content (not just posts), I plan share tidbits of my life as I see fit (instead of a "Five on Friday" post like I was doing). My goal is to do at least one main post once a month on personal life in addition to my recipe posts.

Tuesday, July 29, 2014

Fried Okra

Fresh okra, tossed with a simple breading and fried until golden brown. This comfort food favorite is a cinch to make and very economical! 


Last week was insanely muggy around here. I had planned to barbecue early last week, but it was just too hot to mess with it. As we got near the weekend, the weather started to cool down, so my husband and I decided to barbeque one evening and experiment with a new recipe. While the meat was on the grill, I fried up a quick batch of okra.

Speaking of weather...it's supposed to be really nice this week. We opened our windows last night and it felt like a cool, fall morning when I got up this morning.

Okay, back to the okra...

Frying okra is pretty simple, but there are a few tricks to get it right. I use half flour, half cornmeal in my breading--I feel it adheres better than straight cornmeal. I always season the breading instead of seasoning afterwards. All it needs is a little salt, pepper and paprika. The Paprika is totally optional, it won't make or break the dish if you don't have it.  Paprika gives food a great color and adds just a hint of smoky flavor that I think goes well with the fried food.

I rarely fry food since it tends to be messy and a bit dangerous (oil pops...and sometimes pops at you and burns). When I do fry, I prefer to shallow fry. For this recipe, I only use enough oil to coat the bottom of the pan. Since I cut the okra into pretty small pieces, very little oil is needed.

To Prepare the okra: soak in buttermilk and coat in breading mixture, then allow to sit for 3-5 minutes while the oil heats up. Once you have breaded your okra (or anything you are frying for that matter) it is best to shake off the excess and then spread on a pan and allow to sit for 3-5 minutes (or while your oil heats up). This allows the the milk and breading to gel together and stay on while frying. If you throw the okra immediately into the hot oil, much of the breading will come off and settle in the bottom of the pan (making a mess and burning). I have made that mistake several times when I was in a hurry and didn't want to wait. You will get a better product in the end if you let it sit those extra five minutes.

While the okra is sitting, pour canola oil (or oil of choice) into a frying pan. Just enough so that it covers the bottom of the pan. Heat over medium to medium-high heat until oil starts to "shimmer." I like to test to the oil with one piece of okra. If the oil starts to sizzle once the okra hits, it is ready. Spoon the okra into the pan and spread out evenly (you may have to fry okra in 2-3 batches).  Fry for 3-5 minutes until golden and turn. Fry on the other side an additional 3-5 minutes. Using a slotted spoon, transfer to a plate lined with paper towels to drain. Allow to cool for at least 5 minutes before enjoying!

Frying tips: always stand away when frying and monitor the heat of your oil, it needs to hot enough to "sizzle" and brown the okra, but if it stops popping, turn the heat down. I have an electric stove top and I find that it is hard to control the heat levels when frying. It usually takes a moment for the cook top to cool down to the correct temperature. I typically start heating the oil up on medium-high, but turn down to medium once it's reached temperature. Every stove top is different, you kind of have to play around to figure out the perfect settings.


Fried Okra

Ingredients
  • 1/2 pound okra, cut into small pieces--about 2 cups chopped
  • 1/2 cup buttermilk
  • 1/4 cup all-purpose flour
  • 1/4 cup yellow cornmeal
  • 1/2 teaspoon salt
  • 1/4-1/2 teaspoon black pepper
  • 1/4 teaspoon paprika (optional)
  • Vegetable or canola oil for frying

Directions

1. Wash okra thoroughly; pat dry with paper towels. Slice okra into 1/2 pieces. Transfer okra to a small mixing bowl. Pour buttermilk over okra and stir until coated. Allow okra to soak in the buttermilk while you prepare the breading.

2. In a shallow dish (I like to use a pie plate), mix together the flour, cornmeal, salt, pepper, and paprika until blended. Drain okra and toss with breading mixture. Use a slotted spoon to transfer okra to a cookie sheet, shaking off any excess breading. Spread okra out onto cookie sheet and allow to sit for at least 5 minutes.

3. In a deep frying pan, pour oil until it barely covers the bottom. Heat over medium to medium-high heat. Once the oil start to shimmer, add the okra to frying pan. Fry okra in batches to ensure even cooking. Fry 3-5 minutes and turn okra over using spoon or a spatula. Fry an additional 3-5 minutes or until golden brown. Using a slotted spoon, transfer okra to a plate lined with paper towels. Allow okra to drain and cool before eating, about 5 minutes.

Yields: 3-4 servings

Saturday, July 19, 2014

Exfoliating Coffee Sugar Body Scrub

Homemade coffee scrub serves two purposes: exfoliate skin and improve the appearance of cellulite. Plus, it offers the aroma of freshly, brewed coffee! 


I love making homemade skin and haircare products. Generally, homemade products with natural ingredients work better than anything I've bought from a store. I have been making this homemade scrub for over a year and it's quickly become one of my favorites. It's also inexpensive to make and lasts forever.

I've come across many variations of a coffee scrub, some recycle used coffee grounds(which is a great way to reuse the grounds) but I prefer fresh. Fresh ground coffee smells amazing, and is the perfect pick-me up in your morning shower. I also grind my own coffee beans and leave them a little coarse--the perfect texture for exfoliating.

In addition to freshly ground coffee, you will need: sea salt, brown sugar, and olive oil. I use olive oil because I always have it on hand, but any skin-nourishing oil would work. I suggest coconut oil or almond oil as an alternative. Stir the ingredients together and keep in a mason jar or sealed container in your refrigerator.


I start with a small handful, and massage all over my leg/thigh area. Continue to massage for a few minutes to really exfoliate and rejuvenate your skin.

I typically use this once to twice a week. Overall, I have noticed an improvement in my skin-tone and cellulite appearance. The scrubbing/massaging really the overall improve and texture of your skin. The coffee scent is an added bonus. It perks me up in my early morning shower!

One thing about this scrub, it can get kind of messy! I typically use the scrub at the beginning of my shower, and what's left in the tub will rinse away as the water is still running. Don't be alarmed if the bottom of your tub looks dirty. It will dissolve and rinse away.


Coffee Sugar Body Scrub

Ingredients
  • 1/2 cup freshly ground coffee (if grinding your own coffee, leave the grounds coarse)
  • 1/4 cup light brown sugar or raw sugar
  • 1/4 cup coarse sea salt
  • 2 tablespoons olive oil
Directions

1. In a small bowl, mix coffee, brown sugar,  and salt together. Break up any lumps of brown sugar. Stir in olive oil until well mixed.

2. Store in a mason jar and refrigerate. Lasts up to one year.

3. Use in shower on wet skin. Massage into skin for 3-5 minutes to exfoliate and treat cellulite.