Tuesday, December 31, 2013

Baked Chicken Taquitos


Baked chicken taquitos--a quick and easy meal or appetizer for your next party! Start by mixing the chicken, cheese and other ingredients together and fill flour tortillas and bake until crispy. These would be great for a New Year's or Super Bowl party. They can be made ahead and baked right before serving. I prefer to use a rotisserie chicken or make my chicken ahead, refrigerate, and shred before throwing it together.

I omitted the onion powder and chopped, fresh cilantro from the original recipe. Neither Mark or I care for cilantro, so I leave it out and add fresh chopped parsley for some color. I also substitute Monterey Jack cheese for Pepper Jack cheese. Occasionally I'll do a mixture of the two, but I prefer Monterey Jack. Of course, substitute with whatever cheese you like!


Baked Chicken Taquitos
from Lynda's Recipe Box

  • 1/3 cup (3 ounces) cream cheese, softened
  • 1/4 cup salsa verde  
  • 1/4 teaspoon garlic powder
  • 1/2 teaspoon cumin
  • 1 teaspoon chili powder
  • 1 tablespoon freshly squeezed lime juice
  • 2 tablespoons finely chopped, green onions
  • 2 tablespoons freshly, chopped parsley (optional)
  • 1 cup grated Monterey Jack cheese
  • 2 cups shredded chicken
  • 10-12 fajita size flour tortillas
  • Kosher Salt
  • Cooking spray
1. Preheat Oven to 425 degrees. You will need a non-stick cookie sheet; or a regular cookie sheet lined with foil and lightly coated with cooking spray.

2. In a medium size bowl, mix together the chicken, cheeses, seasonings, green onions, lime juice and salsa. Spoon 2-3 tablespoons of the mixture onto the center of a tortilla, keeping it a half inch from the edge. Roll the tortilla up tightly and line together on the cookie sheet. Make sure they are not touching so that they cook evenly. Spray the top of the taquitos with cooking spray and sprinkle lightly with kosher salt.

3. Bake for 15-20 until crisp and the edges lightly browned. Sprinkle with a little extra lime juice before serving. Serve with sour cream, salsa or guacamole, if desired.

Note: For making ahead, mix all the ingredients (minus tortillas) in a bowl and refrigerate. Once ready to bake, take ingredients out the fridge, assemble, and bake. The taquitos also reheat well in a 400 degree oven for about 10-15 minutes.

Thursday, December 26, 2013

Steak Subs

A hearty lunch that's sure to please!


My husband, Mark, isn't much of a sandwich guy but he loves this steak sandwich. It's easy to prepare and very satisfying.

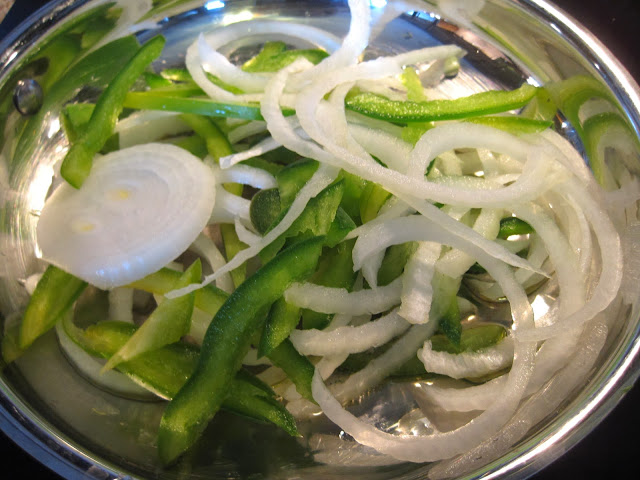
I made enough for two sandwiches-- I used: two tenderized sirloin steaks and one half of a green bell pepper and about one-fourth of an onion (the onion was big, so you may want more). Saute the vegetables until cooked, but where they still have a crunch.


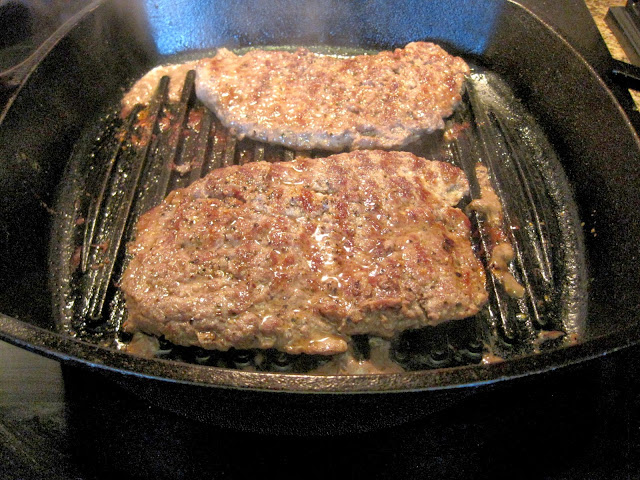
Season the steaks with salt, pepper, and garlic powder. Cook them in a cast iron skillet, griddle or grill pan until well done. I grilled them on my cast iron grill pan (I love that thing...I can grill from the comfort of my own kitchen!).


Transfer the steaks to a cutting board and let rest for a few minutes, then slice the steak into small strips. Layer the steak on a sandwich roll, topped with the bell pepper and onions and slices of mozzarella (I prefer provolone but mozzarella is what I had on hand).


Steak Subs

Ingredients:

2 sirloin steaks, tenderized
Green bell pepper, thinly sliced
Yellow onion, thinly sliced
Salt
Pepper
Garlic Powder
Provolone or Mozzarella slices
Deli Rolls

Directions:

1. Slice green bell pepper and onion into thin strips. Saute in a little olive oil for 6-8 minutes until slightly softened.

2. Season steaks with salt, pepper, and garlic powder. Cook in grill pan or skillet until well done. Transfer steaks to a cutting board and allow to rest for 3-5 minutes. Slice steak into strips.

3. Assemble sandwich by layering steak, peppers, onions, and cheese between a deli roll.

Yields: 2 servings

The Holiday Handbook by Philosophy

I have to share about a cute Christmas gift I received. My mother-in-law got me this "Holiday Handbook" gift set by Philosophy. It contains three hand creams that smell delectable:


Each of the hand creams that have their own unique scent


Gingerbread Cookie


Honey Buns


Cranberry Medley


The cream feels great on and doesn't leave that greasy feeling like some hand creams do. The scents are very rich and smell good enough to eat.


I trust you all had a Merry Christmas. We had a busy one with lots of family and friends; and more yet to come!

Tuesday, December 24, 2013

Merry Christmas

http://fellowshipofminds.files.wordpress.com/2011/12/nativity-scene1.jpg
Photo Credit: Google

 "And there were in the same country shepherds abiding in the field, keeping watch over their flock by night. And, lo, the angel of the Lord came upon them, and the glory of the Lord shone round about them: and they were sore afraid.  And the angel said unto them, Fear not: for, behold, I bring you good tidings of great joy, which shall be to all people. For unto you is born this day in the city of David a Saviour, which is Christ the Lord. And this shall be a sign unto you; Ye shall find the babe wrapped in swaddling clothes, lying in a manger. And suddenly there was with the angel a multitude of the heavenly host praising God, and saying,  Glory to God in the highest, and on earth peace, good will toward men." - Luke 2:8-14


Merry Christmas and a Blessed New Year

Sunday, December 22, 2013

Baked Chicken and Stuffing Casserole

Baked chicken topped with Swiss cheese, homemade cream of chicken sauce and stuffing. A satisfying casserole for any night of the week!


I gave this popular, potluck recipe a makeover with a homemade sauce. Canned cream of chicken soup is typically used for the sauce. I opted to make a lower sodium, homemade cream of chicken. It's quick, easy and tastier than canned soup. 

Start by prepping your chicken: I used three boneless, skinless chicken breasts and cut them in to cutlets (six pieces total). Lay cutlets on a cutting board and cover with plastic wrap. Lightly pound out the chicken until even in thickness. Lightly season with salt and pepper and arrange them into a 9x13 baking dish. Store the seasoned chicken in the fridge until ready to assemble. This allows the salt to tenderize and season the chicken, resulting a moister and flavorful chicken.

Prepare stuffing according to package directions [I prefer reduced-sodium chicken Stove Top]. Set aside. In a saucepan, saute onion in a little butter for 5 minutes. Stir in flour to form a roux, and let cook for 1 minute. Whisk in chicken broth and milk and bring to a simmer. Sauce will thicken after 7-10 minutes. Remove from heat and stir in sour cream.

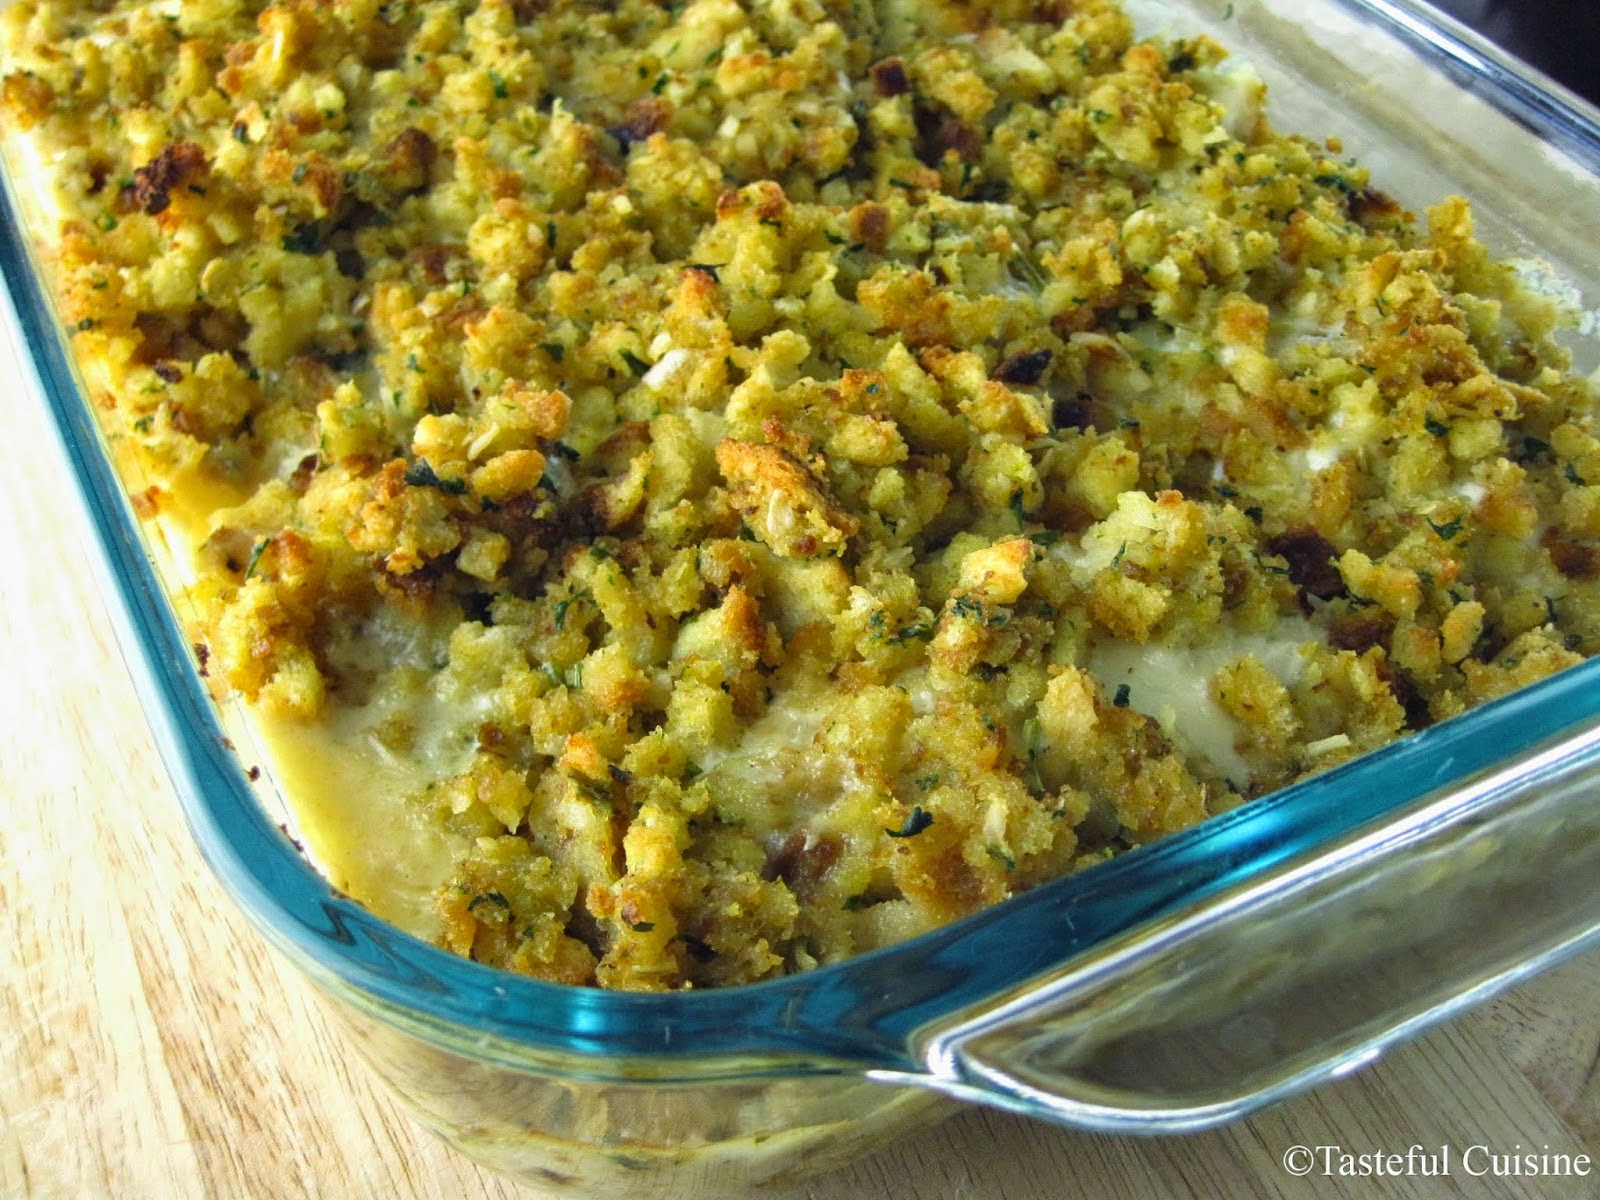
Top each piece of chicken with half a slice of Swiss cheese, pour sauce over the chicken and top with prepared stuffing. Bake for 25-30 minutes until the sauce is bubbly and stuffing is golden brown. Cool for 5 minutes before serving.

Serve with a side of green beans and a garden salad and you have a complete meal in 30-45 minutes!


Chicken and Stuffing Casserole


Ingredients:

3 boneless, skinless chicken breasts, about one pound
1/2 teaspoon salt
1/2 teaspoon black pepper
3 Slices of Swiss cheese, cut in half

Sauce:
2 tablespoons unsalted butter
1/4 cup finely chopped onion
2 tablespoons flour
1 cup chicken broth
1/2 cup milk
2 tablespoons sour cream
1/2-1 teaspoon salt
1/4-1/2 teaspoon of pepper 

Topping:

1 box of Stove Top Reduced-Sodium Stuffing mix, prepared according to package directions

Directions:

1. To prepare the chicken, slice each breast horizontally to create cutlets. Lay cutlets on a cutting board and cover with plastic wrap. Lightly pound out the chicken until an even thickness. Season with salt and pepper on both sides. Arrange in a 9x13 casserole dish. Set aside in refrigerator while preparing the rest of the recipe.

2. In a saucepan, melt butter and saute onions until softened; about 5 minutes. Stir in flour and cook for one minute. Whisk in chicken broth, milk, salt, and pepper. Simmer until thickened, about minutes. Remove from heat and let cool slightly (sauce will thicken as it stands). Stir in sour cream and adjust seasoning if needed.

3. Prepare Stuffing according to package directions. Fluff with a fork. Cover and set aside.

4. Top chicken with half a slice of Swiss cheese, pour sauce over chicken and top with prepared stuffing. Bake in a 400 degree oven for 25-30 minutes or until sauce is bubbly and stuffing is golden brown. Chicken breasts should register 165 degrees. Let stand 5 minutes before serving.

Yields: 4-6 servings

Tuesday, December 17, 2013

Pumpkin Bread

Pumpkin bread is one of my favorite fall and winter recipes. It's a quick bread that's easy to mix together and is very moist--it gets better after each day!

I remember both my Grandmother and Mother making this quite often. They usually add chopped walnuts or pecans to their bread but I leave mine plain. I've had pumpkin bread with a variety of additions, including nuts and dried cranberries.

Those versions are good, but I prefer the Pumpkin bread in all it's pumpkin glory:


Sweet, baby Mufasa wanted to see what I had made...

*Don't worry, I didn't let him near it!

Anyway, this bread is super easy to make, easy to store, and easy to freeze. You really can't mess it up.

And it's great to make for homemade gifts!

Pumpkin Bread
from my Mom, Grandma and Lynda's Recipe Box

Ingredients:
2 1/2 cups unbleached, all-purpose flour
3 cups granulated sugar
2 teaspoons baking soda
1 teaspoon salt
1 teaspoon ground cinnamon
1 teaspoon pumpkin pie spice

1 cup canola oil
2/3 cup water
4 eggs, beaten
1 can of pumpkin puree or 1 3/4 cups fresh pumpkin puree

Directions:

Sift dry ingredients; set aside. In a large mixing bowl, whisk wet ingredients together and fold in dry ingredients. Grease and flour two loaf pans and distribute the batter evenly. Bake at 350 degrees for 1 hour or until toothpick inserted comes out clean. Cool loaves for ten minutes. Run a knife along edges of bread to loosen, invert onto a wire rack and cool completely. Wrap tightly with plastic wrap and store in a container or Ziploc bag. Bread stays fresh up to a week and freezes well.

Thursday, December 12, 2013

Christmas Trees


Small, crisp, almond flavored press cookies. So simple and fun to make!

The dough can be tricky but there a few key elements to make the best dough. Use a good quality vegetable shortening and cream well with granulated sugar. Once it's light and fluffy, add the egg, almond extract (I use imitation because of food allergies) and food coloring. Blend for another minute or two, until the eggs are blended well and dough has a little bit of volume. Sift the dry ingredients together and add to the wet ingredients. The dough needs to be slightly sticky in order to press properly.

Load your cookie press and press away!


My favorite Christmas memory is baking cookies with my mom. I loved making press cookies and sugar cookies. What is your favorite Christmas cookie to make?


Christmas Trees
from Mirro Cookie Press Recipes

1 cup vegetable shortening
3/4 cup granulated sugar
1 egg
1 tsp almond extract
2 1/4 cups all-purpose flour
1/4 tsp baking powder
1/4 salt
Green food coloring
Water, if needed

1. Sift dry ingredients together; set aside. Using a stand or hand mixer, cream shortening till light and fluffy. About 5 minutes. Beat in egg, green food coloring (I used ten drops) and almond extract. Add dry ingredients to wet and mix until dough comes together.

2. Fill cookie press and form cookies onto an non-stick, cookie sheet. Sprinkle with red or green sugar, if desired. Bake at 375 degrees for 7-8 minutes. Let cool slightly on cookie sheet and transfer to cooling rack.

Yields: 6-7 dozen cookies.

Sunday, December 8, 2013

Bacon Wrapped Chicken Stuffed with Pesto


I often have trouble using boneless, skinless, chicken breasts because I run out of ways to fix them. Not only that, they can turn out dry and flavorless.
I have found that bacon and chicken compliment each other quite nicely. The bacon infuses some great flavor into the chicken and the fat from the bacon keeps the chicken tender. The bacon dresses up the chicken nicely so you could serve this for a special occasion; or fix for a quick and easy weeknight dinner.

I sprinkle the chicken with little black pepper and use a simple pesto and Parmesan cheese to stuff the inside of the breast. Do not salt the chicken. The bacon contains salt that will season the chicken nicely. Bake the chicken on a wire rack over a rimmed baking sheet. This allows for even cooking and excess fat to drip away from the chicken. Turn the breasts over halfway through for even browning of the bacon.


Bacon Wrapped Chicken Stuffed with Pesto
from Tasteful Cuisine

4 boneless, skinless chicken breast
2 tablespoons pesto
3-4 tablespoons freshly grated Parmesan cheese
Freshly ground black pepper
12-15 slices of hickory smoked bacon

1. Preheat oven to 400 degrees. Prepare chicken by trimming away any excess fat or skin.  Using a chef's knife, slice through the chicken horizontally, but do not cut all the way through. Lay the chicken pieces out and lightly sprinkle with fresh ground pepper. Spread pesto evenly on the inside of each breast. Sprinkle with Parmesan cheese. Fold the chicken back over and wrap evenly with strips of bacon.

2. Set a wire rack inside a rimmed baking sheet and place chicken on rack. Bake chicken for 20 minutes; flip chicken and bake an additional 10-15 minutes until bacon is nicely browned and chicken registers 165 degrees. Allow chicken to rest for 10 minutes before serving.

Friday, December 6, 2013

Snow Day + Pet Pics

Our first winter storm came through the Midwest today. The cold front started yesterday and this morning we woke up to 4-5 inches of snow. The snowfall isn't bad but the temperatures have been frigid! Today, we had a high of 20 degrees with a low of 3 degrees tonight! Brrr!


I have been sick since yesterday so I've been lounging around all day. Snowy, cold day + stomach bug = one lazy day! No taking pictures of the snow for me, but I managed to snap of few of my pets.

Our sweet, dachshund Lady, snuggled with me today. She's our lap buddy, she always wants to be near you!


Roscoe also stayed near me. Roscoe is our half Bengal, half Tabby mix. She doesn't like to cuddle much but she is always a comfort when feeling under the weather.


This is our youngest, Mufasa. He was an anniversary gift for me (from my sweet husband) and will be six months old on my birthday later this month. We put up our Christmas tree last weekend and he has loved snuggling on the tree skirt.


I hope to feel back to normal tomorrow and get a recipe posted. I plan on doing some baking this weekend, one of my favorite parts of the Christmas season!

If you are in the midst of this storm, I hope you stay warm!

Wednesday, December 4, 2013

Pumpkin Pie


Pumpkin pie is always a traditional staple at our holiday dinners. This creamy, simple pie is delicious on it's own or with a mountain of whip cream (yes, we pile it on in our house!). It's hard to mess up pumpkin pie, but there are a few key steps that make it perfect:

Start by baking the crust before baking with the pie filling. Some people don't pre-bake; they bake the pie and crust all together. With a cream filling, the crust needs a head-start to cook thoroughly. It improves the overall texture of the pie if the crust is evenly crisp.

The filling can pose some challenges. It can be too wet and not set up properly, resulting in a mushy filling and soggy crust. I'm partial to Libby's recipe but I've tweaked it by using fresh pumpkin and simmering it with the spices(a trick learned from America's Test Kitchen). Simmering the pumpkin does two things: it allows the spices to bloom and "dries" the pumpkin--evaporating excess moisture and resulting in a better texture in the pie.

Overall, this is one the easiest pies to make, and it's so tasty!

Pumpkin Pie:
adapted from Libby's with some technique from America's Test Kitchen

1 single pie crust-recipe here
1 3/4 cup pumpkin puree-recipe here
1 teaspoon ground cinnamon
1/2 teaspoon ground ginger
1/4 teaspoon ground cloves
1/2 teaspoon salt
3/4 cup sugar
2 large eggs, beaten
1 can (12 ounces) evaporated milk
Whipped cream for topping, optional

Preheat oven to 400 degrees. 

Crust: On a floured surface, roll out crust to 1/8 inch thickness. Transfer dough to pie plate and press the dough evenly around sides of the plate. Using a pastry brush, brush off any excess flour. Trim pie crust to a 1-inch overhang around the edges. Using index finger and thumb, flute the edges of the crust. Place in the refrigerator for 15 minutes before baking. Remove from refrigerator and line crust with a piece of parchment paper and fill with pie weights. Bake the crust for 10 minutes, remove paper and pie weights, rotate crust for even browning and bake for additional 5 minutes or until lightly browned. Remove from oven and let cool.

Filling: In a small saucepan, bring pumpkin to a sputtering simmer for 5-7 minutes. Add the cinnamon, ginger and cloves and simmer for an additional 10 minutes until pumpkin is thick and spices are fragrant. Allow the pumpkin to cool slightly before proceeding. In a large mixing bowl, beat eggs and whisk in the pumpkin mixture, sugar, salt and milk. Pour into the pie plate and bake for 15 minutes. Lower temperature to 350 degrees; bake an additional 20-30 minutes or until pumpkin is set. Cool completely before serving and refrigerate leftovers.

Sunday, December 1, 2013

Pie Crust

Pie Crust: it's not everyone's favorite thing to make. Pies require a lot of effort and the crust can be the most frustrating part of making a pie. I personally feel that if my crust doesn't turn out good, the whole pie is a waste.

Well, that may be a bit drastic, but you understand my point.

When it comes to making a pie, I need a no-fail method. This is my tried and true crust recipe. It's simple and has always turned out perfect.

The first essential step is chilling ALL of your ingredients. I start by measuring the flour and salt in a mixing bowl, and then putting that bowl into the refrigerator. Yes, I even chill the bowl. Chill the shortening (and butter if you choose to use) as well. I also use ice water (or water that you've chilled in the fridge or freezer). Once everything is nice and cold, you are ready to begin.

Using a pastry cutter, cut the shortening into the flour and salt. The mixture should be crumbly like so:


Pea sized pieces and smaller


Slowly add water and mix. I'm sorry, but the best way to do it is to get your hands in it!


Clean hands of course...


Do not over mix! Over mixing causes the dough to be tough. Only mix till the dough comes together and is no longer crumbly. Turn the dough out onto a floured work surface and lightly knead and pat together like so:


Tightly wrap the dough with plastic wrap and chill in the refrigerator until ready to use. To save time, make the crust a day ahead. It will be chilled and ready to go!


Pie Crust:

Single-Crust Pie:

1/2 cup vegetable shortening (I recommend Crisco)
1 1/2 cups all purpose flour 
1 teaspoon salt
3-4 tablespoons ice water

Double-Crust Pie:

1 cup vegetable shortening
3 cups all purpose flour
2 teaspoons salt
6-8 tablespoons ice water

Mix flour and salt together. Using a pastry blender, cut shortening into flour until crumbly. Slowly add cold water and mix until dough comes together. Turn dough onto a floured cutting board and lightly knead until dough comes together. Tightly wrap with plastic wrap and refrigerate. Refrigerate for one hour before assembling pie. The crust keeps indefinitely in the fridge or freezer.

Note: For a rich, buttery crust, substitute half of the shortening with unsalted butter.


Tuesday, November 26, 2013

Pumpkin Puree

Last Thanksgiving, I got put in charge of the pumpkin pie. Growing up, I remember baking pumpkins with my mom so I decided to give it a try again. Making your own pumpkin is very easy and you can make it a day or freeze. Canned pumpkin is fine, but there is nothing like fresh, baked pumpkin.

I started with this beautiful pie pumpkin from our local farmers market


Cut off the top. You will need a good, sturdy chefs nice for this. Cut in a half and clean out the seeds.


Quarter the pumpkin and arrange on a cookie sheet or baking pan and bake until pumpkin is tender. Process cooked and cooled pumpkin until a smooth consistency. And silly me, I didn't get a final picture of the puree! But here is the finished product: pumpkin pie!


Pumpkin Puree
from Tasteful Cuisine

1 pie pumpkin (or as many as you want to bake)

Preheat oven to 350 degrees. Rinse pumpkin thoroughly and pat dry. Cut top off of pumpkin and cut in half. Clean out the seeds and quarter pumpkin. Arrange on a non-stick cookie sheet and bake for 45 minutes to 1 hour or until tender. Rotate the pumpkin halfway through so that cooks evenly. Cool completely. Peel the skin off the pumpkin and cut into small pieces. Transfer pumpkin to a food processor and process until a fine pulp. This mixture can be refrigerated up to 7 days or frozen for later use. Yields three cups.

Sunday, November 17, 2013

Pumpkin Pie Spice

It's that time of year for everything pumpkin. Pumpkin pie spice is an essential ingredient in fall baking. But why buy another jar of spice when you can make it with spices you already have in your pantry? It's simple!

Just measure out your ingredients:


Mix Together:


And Voila! You have your own homemade pumpkin pie spice:


I like making my own for a two reasons: I rarely make pumpkin recipes, so this allows me to make a small amount for the season. It would literally take me three or four years to go through a jar, by then it's no good. It also allows me to tweak the spice how I want. If I want more cinnamon, I can adjust and add more cinnamon. If I want more spice I can add more cloves and so on.


Pumpkin Pie Spice
from Tasteful Cuisine

Yields: 1 tablespoon

2 teaspoons cinnamon
1 teaspoon ground nutmeg
1/2 teaspoon ground ginger
1/4 teaspoon ground allspice
1/4 ground cloves

Mix spices together and store in airtight jar or container.
 
Or

Yields: 1/4 cup

2 tablespoons cinnamon
1 tablespoon ground nutmeg
2 teaspoons ground ginger
1 teaspoon ground allspice
1 teaspoon ground cloves


Tuesday, November 5, 2013

Preserving Herbs

This past spring, my husband built some raised beds to start a small garden. I planted mostly herbs with a few tomato and pepper plants (I tried to start small, this is my first gardening on my own). I love using fresh herbs so I planted as much as I possibly could. Now that fall is upon us, I need to preserve some of the herbs for the winter. We had our first small frost last week so I was busy preparing all my herbs before it hit.


Herbs from left to right: Basil, Oregano, Parsley, and Rosemary


To prepare herbs for drying, line cookie sheet with parchment paper, wash and dry the herbs, and spread the herbs in an even layer on a cookie sheet. Store in a dry place for ample drying time. I placed mine in a dry corner in the kitchen that is close to a heat vent and sunny window.  You can also dry herbs by tying together in a bundle and hanging them in a dry place.


Dried Oregano

I also made some lovely basil pesto and froze tablespoon amounts in ice cube. Once the cubes of pesto are frozen, pop them out and place them in a Ziploc bag. These are great to add to a sauce for an extra pop of flavor.


I got a little messy with the pesto...


Here's a run-down of what I did with each herb:

Using a strong pair of kitchen shears, harvest herbs from the garden. Cut stems at the base of the plant or as close as possible.

Carefully wash and dry herbs (a salad spinner works great for this). Lay out on paper towels to dry thoroughly.

Oregano: Remove oregano leaves from stem. Spread out on a cookie sheet to dry. 
Basil: Basil is a soft herb and is hard to dry so I opted for keeping it as fresh as possible. Use basil to make pesto and freeze in ice cube trays. Or freeze chopped basil leaves in olive oil. Once the cubes are frozen, remove and put in freezer safe containers or bags.
Parsley: Remove leaves from stem and finely chop the leaves. Spread in an even layer on a lined cookie sheet. You can also freeze parsley in olive oil as you do with basil.
Rosemary: Lay the stems out to dry. Once dry, pluck the leaves off of the stem.


Store all dried herbs in Ziploc baggies or spice containers or jars.

I also have some potted herbs that I plan to keep indoor this winter. This way I can use fresh herbs all year around!

Sunday, October 27, 2013

Sheet Pan Pizza


Last year, one my Christmas gift requests was a subscription to Cook’s Country magazine.  My mom purchased it for me and the magazine is always full of helpful hints and tasty recipes. I love Cook’s Country. I love the show, watch it every time it’s on, and I watch reruns! They never get old. I plan to try a lot of their recipes on this blog.


I came across this pizza recipe in one of their issues and have wanted to try it for a while. Pizza is one of my favorite Friday night meals to fix and I love trying different pizza recipes. This recipe is a simple sheet pan recipe that doesn’t require a pizza stone. The pan requires a lot of olive oil so that it “fries” the crust and gives it a crisp, browned exterior. Combine that with a simple homemade sauce, rich mozzarella and parmesan cheeses, fresh basil and the toppings of your choice and you have one satisfying piece of pizza.


Sheet Pan Pizza
Cook's Country-Issue: April/May 2013

Dough:

1 3/4 cups warm water (110 degrees)
1/2 cup plus one tablespoon olive oil
1 tablespoon sugar
5 cups all-purpose flour
4 1/2 teaspoons instant yeast
2 teaspoons salt

Sauce and Toppings:

1 tablespoon olive oil
3 garlic cloves, minced
1 1/2 teaspoons dried oregano
1/8 teaspoon red pepper flakes
2 tablespoons tomato paste
1 (28-ounce) can crushed tomatoes
Salt
1 1/2 ounces (3/4 cup) of parmesan cheese, grated
12 ounces (3 cups) mozzarella cheese, shredded
2 tablespoons chopped fresh basil
Toppings of your Choice (I used Italian Sausage) or leave it plain!

1. Dough: Combine water, 1/4 cup oil and sugar in a 2 cup liquid measuring cup. Using stand mixer fitted with dough hook, mix flour, yeast, and salt on low speed until combined. Increase speed to medium low, add water mixture, and knead dough for 3 minutes or until uniform in texture. Transfer dough to bowl greased with one tablespoon of olive oil. Cover with plastic wrap, and let rise at room temperature* until doubled in size, 1-1 1/2 hours.
2. Brush 1/4 cup of olive oil onto a rimmed baking sheet. On a lightly floured work surface, roll dough in a 16x12 inch rectangle. Transfer dough to cookie sheet and press dough into corners. Brush dough with one tablespoon olive oil and cover with plastic wrap. Let dough rise for approximately 20 minutes.
3. Sauce and Toppings: While dough rises, heat oil in large saucepan over medium heat. Cook garlic, oregano and pepper flakes for 30 seconds or until fragrant. Stir in tomato paste and cook until light brown, about 2 minutes. Add tomatoes and simmer until reduced to three cups, about ten minutes. Season with salt and pepper to taste.
4. Adjust oven rack to lowest position and preheat oven to 450 degrees. Uncover the dough and make small indententions all over, using your fingers. Sprinkle half of the Parmesan cheese and bake for 7-10 minutes or until cheese begins to melt. Remove crust from oven. Spoon sauce over crust leaving a 1-inch border. Bake until sauce is deep red and steaming, 7-10 minutes.
5. Remove pizza from oven, Sprinkle with Mozzarella and remaining Parmesan cheese and top with desired toppings. Bake until cheese is golden brown, about 12 minutes. Remove pizza from oven and let rest for 5 minutes. Top with freshly chopped basil and serve.

*Speed up the rise time by preheating your oven to 150 degrees. Once it reaches temperature, turn off the oven and open the oven door to let some heat escape. Once the oven has a cooled a bit, place your bowl of dough onto a cookie sheet and place in the oven. This creates a warm environment to accelerate the yeast. Be careful the oven is not too warm, hot temperatures can kill the yeast.

Wednesday, October 23, 2013

Ranch Dip


We had a family get-to-together over the weekend. Our town has a huge fall festival and my husbands family always has a big family reunion. One of my contributions was a veggie tray and dip. I wanted to use fresh herbs from my garden for the dip so I scoured the internet for a good recipe. I came across Pioneer Woman's ranch dressing recipe. It was exactly what I was looking for. Of course, hers is for a dressing but I left the milk out and it made the perfect dip. It's a very versatile dip, as you can add the herbs you would like. I kept it simple with parsley, chives and a pinch of dill.  It was bright, fresh and the perfect compliment for the tray.


Ranch Dip
From Pioneer Woman Cooks

1 cup real mayonnaise
1/2 cup sour cream
1/4 cup flat leaf Italian Parsley, finely chopped
2 tablespoons chives, finely chopped
1 clove of garlic, smashed and finely chopped
Dill to taste*
Salt
Pepper

Smash and chop the garlic until a fine paste. Finely chop the parsley and chives. In a small bowl, mix garlic, herbs, mayonnaise and sour cream together. Add salt, pepper, and dill to taste.


*I didn't have fresh dill so I used dry. I added two pinches of it and it was perfect. You will have to adjust accordingly for fresh dill.
Note: To make ranch dressing, mix all ingredients together and stir in milk or buttermilk until desired consistency.

Sunday, October 13, 2013

Cappuccino Cake


Here is a quick post for an easy recipe. One evening, I came across this delicious recipe while watching "Lidia's Italy in America." This cappuccino cake, or "pie", is the perfect ending to any meal. It's very easy to prepare and can be done a day ahead. If you like coffee and chocolate, this is a dessert for you!


Cappuccino Cake
from Lidia's Italy in America

Crust:

12 chocolate graham-cracker sheets, crushed (2 1/3 cups)
3 tablespoons sugar
2 tablespoons instant espresso powder
Pinch kosher salt
5 tablespoons unsalted butter, melted and cooled

Filling:

1 quart coffee ice cream
1 cup heavy cream
1 tablespoon sugar
1/2 cup of sour cream

Preheat oven to 350 degrees.

In a food processor, grind together the graham crackers, sugar, espresso, and salt until fine. Add the melted butter and pulse until combined. Press the crumbs into the bottom and up the sides of a 8-inch pie plate. Bake the crust until set, about 10-12 minutes. Cool completely before filling.

Remove ice cream from the freezer to soften a bit. Using a stand or hand mixer, whip the cream and sugar until soft peaks form. Gently whisk in the sour cream until combined.

Spread the ice cream in an even layer in the cooled pie shell. Spread the whip cream evenly over the ice cream, add chocolate shavings if desired. Cover tightly with plastic wrap and freeze until cream is frozen, at least 4 hours or overnight. To Serve, remove pie from freezer and allow to set at room temperature for 10-15 minutes before slicing. Cut with a knife dipped in hot water and serve immediately.

*Note: The original recipe called for twice the whipped cream. I thought it sounded like too much so I halved it and I thought it was the perfect amount. Use your judgement though, if you like a lot of cream, double the amount of heavy cream, sugar and sour cream.


Saturday, September 14, 2013

Creamy Cauliflower Sauce


I first came across this recipe on Pinterest. There are several recipes out there for cauliflower sauce but I adapted this one from Pinch of Yum. It is designed to be a healthy version of Alfredo sauce. It's a clever use of cauliflower and a great way to add more vegetables into your diet. The sauce can be very versatile but I usually serve it over pasta topped with sliced chicken and Parmesan cheese. While this meant to be like an Alfredo, it will not taste like Alfredo. Alfredo is rich and buttery and the cauliflower sauce is light and, well, tastes like cauliflower! To me, it's the perfect guilt-free sauce, because I can pile it on without  thinking about the calories. And it's husband approved!


The sauce does pose a small challenge. Cauliflower isn't the most flavorful vegetable, so you have to incorporate as much flavor as possible into a very simple dish. The original recipe calls for 5-6 cups (or a whole head) of cauliflower to be boiled in 6-7 water or vegetable broth. I do not suggest using water because it won't add as much flavor to the dish. You can, you just won't get the same results. I felt it would be wasteful to make or buy all that vegetable stock when only 1 cup gets incorporated into the sauce. So, I decided to infuse the water before adding the cauliflower by making a quick broth in the same pot. In a dutch oven, I added 5-6 cups of water, a small onion, carrot, celery, garlic, a bay leaf and salt. Quarter the onion and chop the carrot into big pieces. Bring the pot to a boil and simmer for 15 minutes. Then add the cauliflower and boil for 10 minutes or until tender.


After preparing the cauliflower, it is pureed in the blender with delicious garlic butter, milk and broth. I served this sauce over pasta with with a side salad and garlic bread. This is a great make ahead sauce that reheats and freezes well. Here is the recipe to this delicious sauce:


Creamy Cauliflower Sauce
Adapted from Pinch of Yum

Ingredients:

6-7 cups water
Vegetables to create a broth: 1 carrot, 1 stalk celery, 1 small onion, 1 smashed clove of garlic and 1 bay leaf.
5 cloves of garlic, smashed and minced finely
2 tablespoons unsalted butter
1 head of cauliflower florets
1/2 cup of milk
Salt
Pepper

Instructions

1.  In a dutch oven, bring to boil water, carrot, onion, 1 clove garlic, bay leaf and 1 teaspoon salt. Simmer for 15 minutes. Add cauliflower florets and boil for 10 minutes or until fork tender.

2. To prepare the garlic, melt butter in a 12-inch skillet (this is the skillet you will return the sauce to). Peel, smash and finely chop the garlic. Add the garlic to the melted butter and saute only until the garlic is fragrant. It only takes about 30 seconds. If you cook the garlic longer, you run the risk of browning it. Browning or overcooking garlic will make it bitter. You just want to soften the garlic and release the flavor.

3. Using a slotted spoon, transfer cauliflower florets to blender along with the garlic butter, 1 cup of broth and milk. Puree until smooth adding more milk or broth if needed. You may need to blend in two batches depending on the size of your blender. Pour sauce into skillet and add salt and pepper to taste. Turn on low heat and keep warm until ready to serve. You can add more broth or milk if needed and depending on the consistency you want. If you want a thin sauce add more liquid. If the sauce gets dry, add more broth, milk, butter or olive oil. Serve over pasta with freshly grated Parmesan cheese* if desired.

*Parmesan cheese goes really well with this sauce. However, it will not melt into the sauce so I suggest just adding a sprinkle on top.


Wednesday, September 4, 2013

Blueberry Streusel Muffins


My favorite breakfast foods are ones that are quick, easy and can be eaten on the run. I often make muffins or scones because I can bake them the night before, and pack them for our breakfast the next morning. I had some plump, fresh blueberries to use and wanted to find a rich, streusel muffin recipe to try. I came across this from Taste of Home and looked like it would be a good one. The muffin has a soft texture that pairs well with the crisp, sweet, streusel topping. The streusel has a hint of cinnamon and give the right amount of richness to the muffin. I think this muffin recipe will be a keeper!

Blueberry Streusel Muffins
Yields: 1 dozen muffins
From Taste of Home

Ingredients:

  • 1/4 cup unsalted butter, softened
  • 1/3 granulated sugar
  • 1 large egg
  • 1 teaspoon pure vanilla extract
  • 2 1/3 cups unbleached all-purpose flour
  • 4 teaspoons baking powder
  • 1/2 teaspoon salt 
  • 1 cup milk
  • 1 cup fresh or frozen blueberries* 

Streusel Topping:

  • 1/2 cup granulated sugar
  • 1/3 cup unbleached all-purpose flour
  • 1/4 cup unsalted cold butter
  • 1/2 teaspoon cinnamon

Preheat oven to 375 degrees. Grease or paper line a 12 cup muffin pan.

In a small bowl, combine sugar, flour and cinnamon. Mix together and then cut in cold butter until mixture is crumbly. Store in the refrigerator until ready to use.

In a mixing bowl, cream softened butter and sugar until light and creamy, about five minutes. Mix in egg and vanilla. Sift the dry ingredients together and mix in alternately with milk. Mix until you no longer see flour but do no over mix. Fold in blueberries. Fill muffin cups 2/3 full and top each cup with a generous amount of the streusel topping. Bake for 25-30 or until golden brown. Cool in the pan for 5 minutes before removing to a wire cooling rack.

*Original recipe called for 1 1/2 cups of blueberries. I had some plump blueberries so I thought one cup was plenty. Use your own judgement when making the muffins. If you like more blueberries, use more!