Showing posts with label 30-minute meals. Show all posts

Monday, November 3, 2014

French Bread Pepperoni Pizza

Need a quick dinner idea? Love pizza, but don't have the time to make a homemade crust? Try this quick and easy French bread pizza. 


I posted a recipe for my homemade pizza sauce last week so I figured I needed to post a recipe that you can use it for! Growing up, my mom would occasionally make us this French bread pizza. It's super simple and you don't have to deal with the hassle of making a crust.

I for one, love a good homemade pizza crust but I don't always have time to make the bread dough. For a good pizza, in a short amount of time, I will whip out one of these French bread pizzas.


It's so simple: pick up a loaf of French bread at your supermarket's bakery, slice it lengthwise in half, brush with a little olive oil, toast it for a few minutes in the oven, add your toppings, pop back in the oven and bake until cheese is bubbly and bread is golden.


Simple right?

French Bread Pepperoni Pizza

Ingredients
  • 1 loaf of French bread
  • Extra virgin olive oil
  • Pizza Sauce 
  • 4-6 ounces of mozzarella, shredded
  • Pepperoni
Directions

1. Preheat oven to 425 degrees. Slice French bread in half lengthwise. Place onto a rimmed baking sheet (I usually brush a little olive oil onto the pan underneath the bread). Brush the tops of the bread with a little olive oil. Toast in the oven for about 5 minutes.

2. Top French loaves with pizza sauce, mozzarella, and pepperoni. Return to oven and bake for about 8-10 minutes or until cheese is melted and bubbly. Cool for 5 minutes before slicing and enjoying.

Note: Pizza can be made with a variety of toppings. If using additional cheese or toppings, hollow out a little bit of the loaf so that it can hold all of the toppings.


Friday, September 12, 2014

Baked Chicken and Stuffing Casserole - An Update

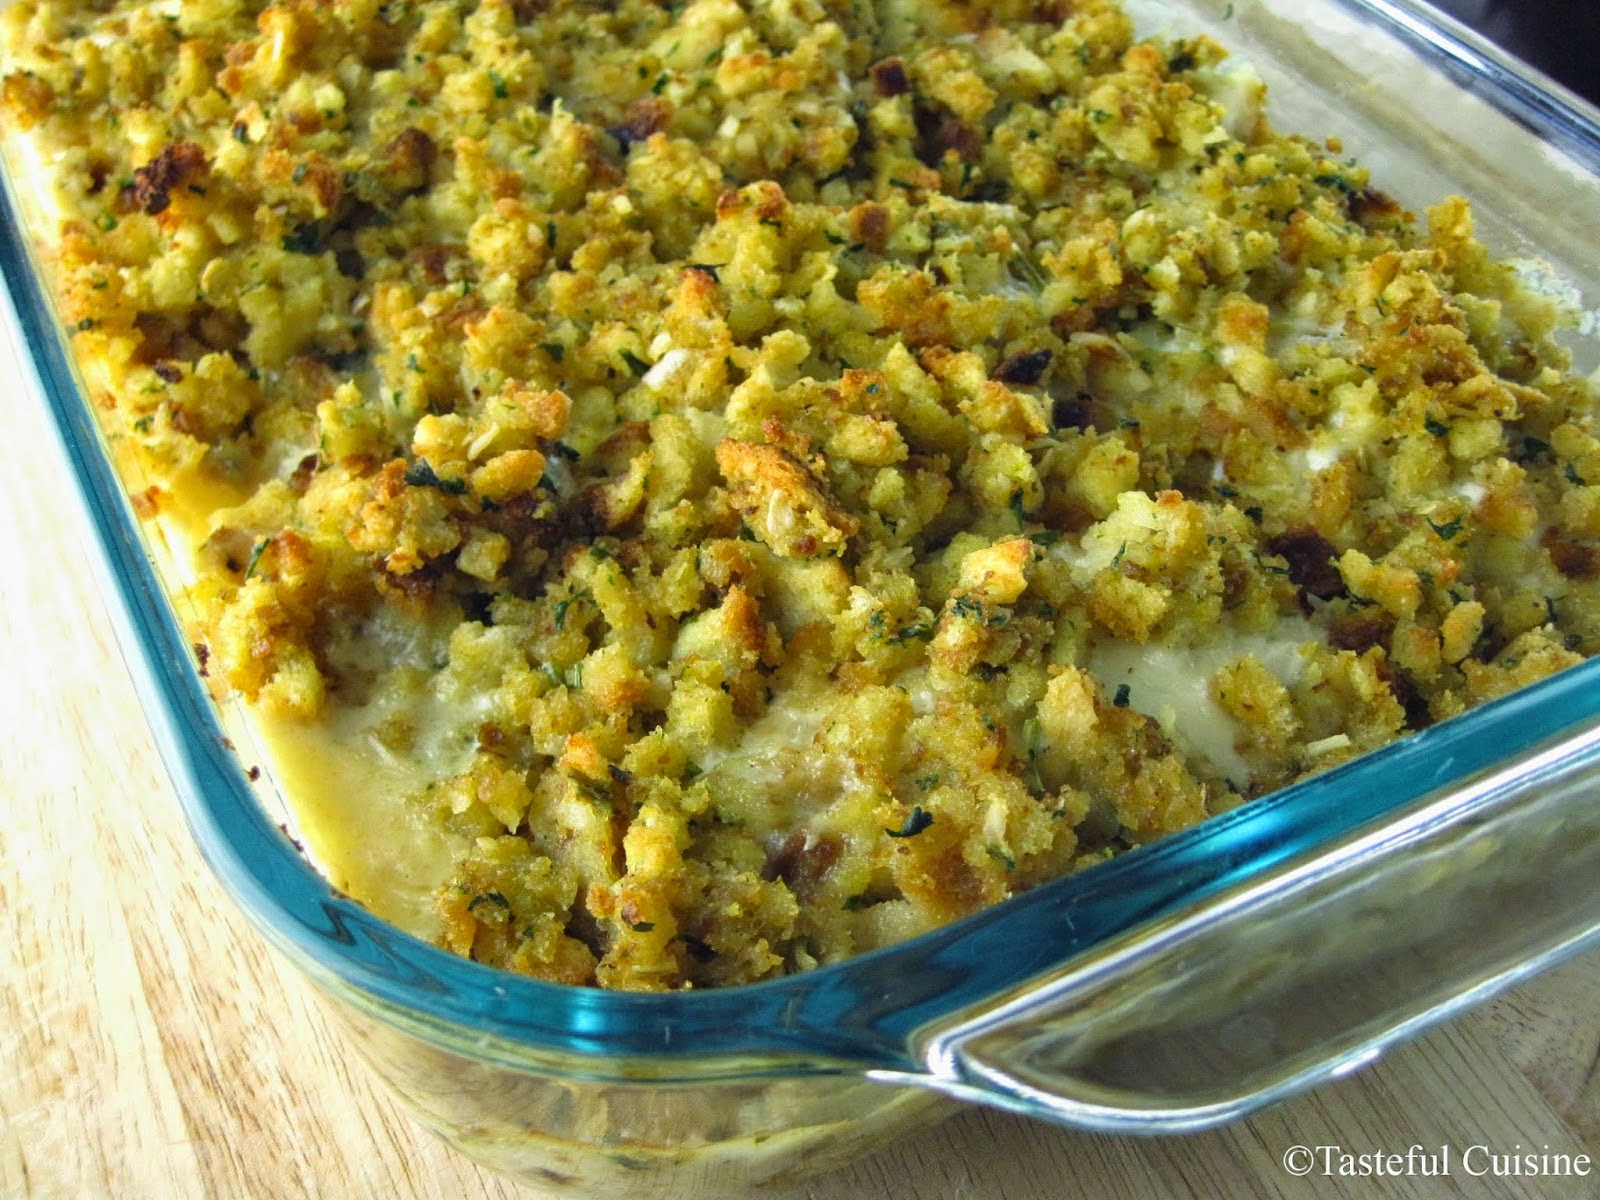
Baked chicken topped with Swiss cheese, homemade cream of chicken sauce and stuffing. It's one of my most popular recipes on my blog so far!


I posted this recipe for chicken and stuffing casserole last year. Since starting my blog, this casserole recipe has been one of my most viewed recipes. I made a few minor changes (added cheese, took some new photos and explained my technique a little better). I always aim to improve my recipes and plan to share with you as I update them.

The weather is supposed to remain cool the next few days. This would be the perfect casserole for a hearty, evening meal!

Baked Chicken and Stuffing Casserole

Thursday, June 19, 2014

Layered Taco Salad

All of your favorite taco fixings in a easy, layered taco salad. It's one of my favorite, quick summer recipes!


I think summer is officially here! These last few days have been hot and humid

During the sweltering, summer months, I prefer to fix easy recipes that don't involve the oven. I have a tiny kitchen in my house and it doesn't take long for it to heat up.

Salads are always a good option, but it has to be a hearty salad that will be filling for Mark. This taco salad is very simple to throw together--it's ready in three easy steps: prepare meat, prep toppings, and assemble salad!

Growing up, my Mom made a taco salad that was mixed together in one large bowl. Later on in my junior high years, she came up with this idea to do a layered taco salad. It's a simple process of making taco meat and preparing various toppings. This "build your own" style allows everyone to choose the toppings that they please. Don't like beans? Add more meat. Don't want tomatoes? Add more salsa or cheese or any of your favorite toppings. This salad is completely customizable!


Notice how simple of a dinner this was: I photographed the salad on a paper plate. I know...it's probably a food photography no-no. 

Sometimes, simple food just needs a simple setting. :)  


Layered Taco Salad

Ingredients
  • Tortilla chips
  • Taco meat - you can find my recipe here
  • Black beans
  • Freshly chopped romaine lettuce
  • Diced tomato
  • Shredded Monterrey jack and cheddar cheese
  • Sour Cream
  • Salsa
Directions

1. Prepare Taco Meat.
2. Prep other ingredients: chop lettuce, dice tomatoes, and shred cheese.
3. Assemble salad as desired.

Source: Tasteful Cuisine

Tuesday, January 21, 2014

Chicken Teriyaki


Do you ever have one of those weeks when nothing seems to go your way? Last week, I was sick, so that kept me from cooking (and blogging) for a few days. When I finally felt like cooking again, it seemed like nothing turned out quite right. I managed to break my best platter (which brought me to tears) and I spilled a majority of the rice for this dish, all. over. the. floor.

Let me set that straight. I casually reached in the cabinet, for my container of rice, had a firm grip on the lid, when the lid decided to pop off, sending the container through the air and rice all over my kitchen. I managed to save some of it, because I was NOT going back to the store for rice (I had already grocery shopped that evening).  

Sometimes you gotta do what you gotta do.

Thankfully I had just enough rice left to make for Mark and I. I managed to to make this dish with no more accidents and it turned out quite well.  I share all of this because sometimes, no matter how experienced you are, things don't always go well in the kitchen.

You will make mistakes.

Things will break.

Dishes won't turn out how you envisioned.

But you just have to plug away and keep cooking!

Onward now to this delicious teriyaki:


I created this chicken teriyaki two years ago when I wanted a quick skillet dish during the hot, summer months. I'm not fond of most Asian cuisine, but Mark loves it. So I tried to create a happy medium by using simple ingredients and amping up the natural flavors.

Start by heating some olive or canola oil in a skillet (you can also use a wok if you own one). Once the oil is shimmering, add the chicken and brown on all sides. Pour the chicken into a bowl and set aside. Return the skillet to the heat and add more oil. Once the oil is shimmering, add the onion and saute for 5 minutes. Add the garlic, ginger, and red chili flakes and cook until those are fragrant. In a small bowl or liquid measuring cup, whisk together the soy sauce, water, sugar and cornstarch. Make sure the cornstarch is incorporated well and that they're no lumps. Whisk the sauce into the skillet and bring to a simmer. Once the sauce starts to thicken, add the chicken back to the skillet.  Cover and allow to simmer and heat through for 5 minutes.

While the chicken and sauce are simmering, steam the broccoli. I like to use the entire head of broccoli, stalk and all. I peel the stalk a little bit so that the broccoli is tender. Rinse the broccoli under cold water and cut into desired size pieces. I like to cook the broccoli separately so that it does not absorb too much of the sauce. Use a saucepan and steamer basket and steam for 3-5 minute, until the broccoli is bright green and tender.

Pour the broccoli into the skillet and toss with the chicken and sauce. Serve over steamed, white or brown rice and you have yourself a complete meal! Meat, grain and veggies all in one! Sometimes, I also like to add carrot matchsticks to this dish as well. Just steam with broccoli and toss like usual. If you would like to add another vegetable I suggest serving with a side salad.

Teriyaki Chicken

Ingredients:
  • 2 boneless, skinless chicken breast--cut into 1 inch pieces
  • 1/2 onion, finely diced
  • 2 cloves of garlic, finely minced
  • 1 tablespoon fresh ginger, grated
  • 1/4 teaspoon red chili flakes
  • 1/2 cup low-sodium soy sauce
  • 1/4 cup water
  • 1/4 cup + 2 tablespoons granulated sugar
  • 1 teaspoon cornstarch
  • 1 head of broccoli (1/2 to 3/4 pound) cut into pieces
  • Olive or canola oil 
  • White rice, prepared
Directions:

1. Heat 2 tablespoons of olive in a 12-inch skillet over medium heat. Add chicken and brown on all sides. Remove from skillet and set aside. Add 1 tablespoon of olive to the skillet and add onions. Saute the onions until softened, about 5 minutes. Add the minced garlic, ginger, and red chili flakes. Cook until fragrant, 30 seconds to 1 minute.

2. Whisk together the soy sauce, water, sugar, and cornstarch. Add the liquid to the skillet and whisk until it begins to simmer. Simmer for one minute or until sauce begins to thicken. Return the cooked chicken to the skillet and cover. Simmer the sauce for about 5 minutes.

3. In a separate pan, steam the broccoli until bright green and tender. About 3-5 minutes. Stir the broccoli into the chicken and sauce. Serve over rice.

Yields: 3-4 servings

From: Tasteful Cuisine


Sunday, December 22, 2013

Baked Chicken and Stuffing Casserole

Baked chicken topped with Swiss cheese, homemade cream of chicken sauce and stuffing. A satisfying casserole for any night of the week!


I gave this popular, potluck recipe a makeover with a homemade sauce. Canned cream of chicken soup is typically used for the sauce. I opted to make a lower sodium, homemade cream of chicken. It's quick, easy and tastier than canned soup. 

Start by prepping your chicken: I used three boneless, skinless chicken breasts and cut them in to cutlets (six pieces total). Lay cutlets on a cutting board and cover with plastic wrap. Lightly pound out the chicken until even in thickness. Lightly season with salt and pepper and arrange them into a 9x13 baking dish. Store the seasoned chicken in the fridge until ready to assemble. This allows the salt to tenderize and season the chicken, resulting a moister and flavorful chicken.

Prepare stuffing according to package directions [I prefer reduced-sodium chicken Stove Top]. Set aside. In a saucepan, saute onion in a little butter for 5 minutes. Stir in flour to form a roux, and let cook for 1 minute. Whisk in chicken broth and milk and bring to a simmer. Sauce will thicken after 7-10 minutes. Remove from heat and stir in sour cream.

Top each piece of chicken with half a slice of Swiss cheese, pour sauce over the chicken and top with prepared stuffing. Bake for 25-30 minutes until the sauce is bubbly and stuffing is golden brown. Cool for 5 minutes before serving.

Serve with a side of green beans and a garden salad and you have a complete meal in 30-45 minutes!


Chicken and Stuffing Casserole


Ingredients:

3 boneless, skinless chicken breasts, about one pound
1/2 teaspoon salt
1/2 teaspoon black pepper
3 Slices of Swiss cheese, cut in half

Sauce:
2 tablespoons unsalted butter
1/4 cup finely chopped onion
2 tablespoons flour
1 cup chicken broth
1/2 cup milk
2 tablespoons sour cream
1/2-1 teaspoon salt
1/4-1/2 teaspoon of pepper 

Topping:

1 box of Stove Top Reduced-Sodium Stuffing mix, prepared according to package directions

Directions:

1. To prepare the chicken, slice each breast horizontally to create cutlets. Lay cutlets on a cutting board and cover with plastic wrap. Lightly pound out the chicken until an even thickness. Season with salt and pepper on both sides. Arrange in a 9x13 casserole dish. Set aside in refrigerator while preparing the rest of the recipe.

2. In a saucepan, melt butter and saute onions until softened; about 5 minutes. Stir in flour and cook for one minute. Whisk in chicken broth, milk, salt, and pepper. Simmer until thickened, about minutes. Remove from heat and let cool slightly (sauce will thicken as it stands). Stir in sour cream and adjust seasoning if needed.

3. Prepare Stuffing according to package directions. Fluff with a fork. Cover and set aside.

4. Top chicken with half a slice of Swiss cheese, pour sauce over chicken and top with prepared stuffing. Bake in a 400 degree oven for 25-30 minutes or until sauce is bubbly and stuffing is golden brown. Chicken breasts should register 165 degrees. Let stand 5 minutes before serving.

Yields: 4-6 servings